ArtisJet Blog
One of the most common technical questions we received from users is whether there is any way to speed up the printing process.
Printing time is determined by a mixture of various factors, including the way the ink is ejected, the desired printing effects and, of course, the digital artwork itself (different graphics, real photo prints, print colorful patterns, complex illustrations designs, funny emojis / emoticons printing or just simple text printing).
The artisJet system offers two main ways to accelerate the printing process by altering the way the ink is ejected: through unidirectional or bidirectional setup and the number of print passes (4 pass, 8 pass or 16 pass).
The unidirectional and bidirectional way for reducing print time
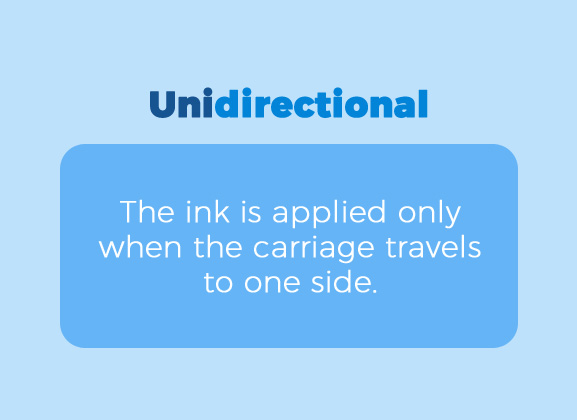
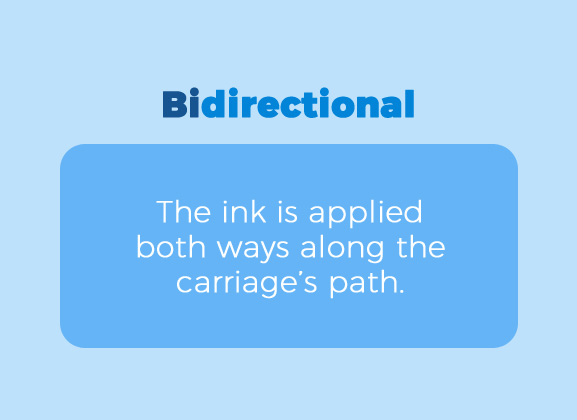
What is the uni-directional printing and bi-directional printing and what are the differences between them?
Unidirectional – the ink is applied only when the carriage travels to one side;
Bidirectional – the ink is applied both ways along the carriage’s path.
How to set the print direction for each task? How to estimate the printing time for bidirectional setting? Have a look on the below videos.
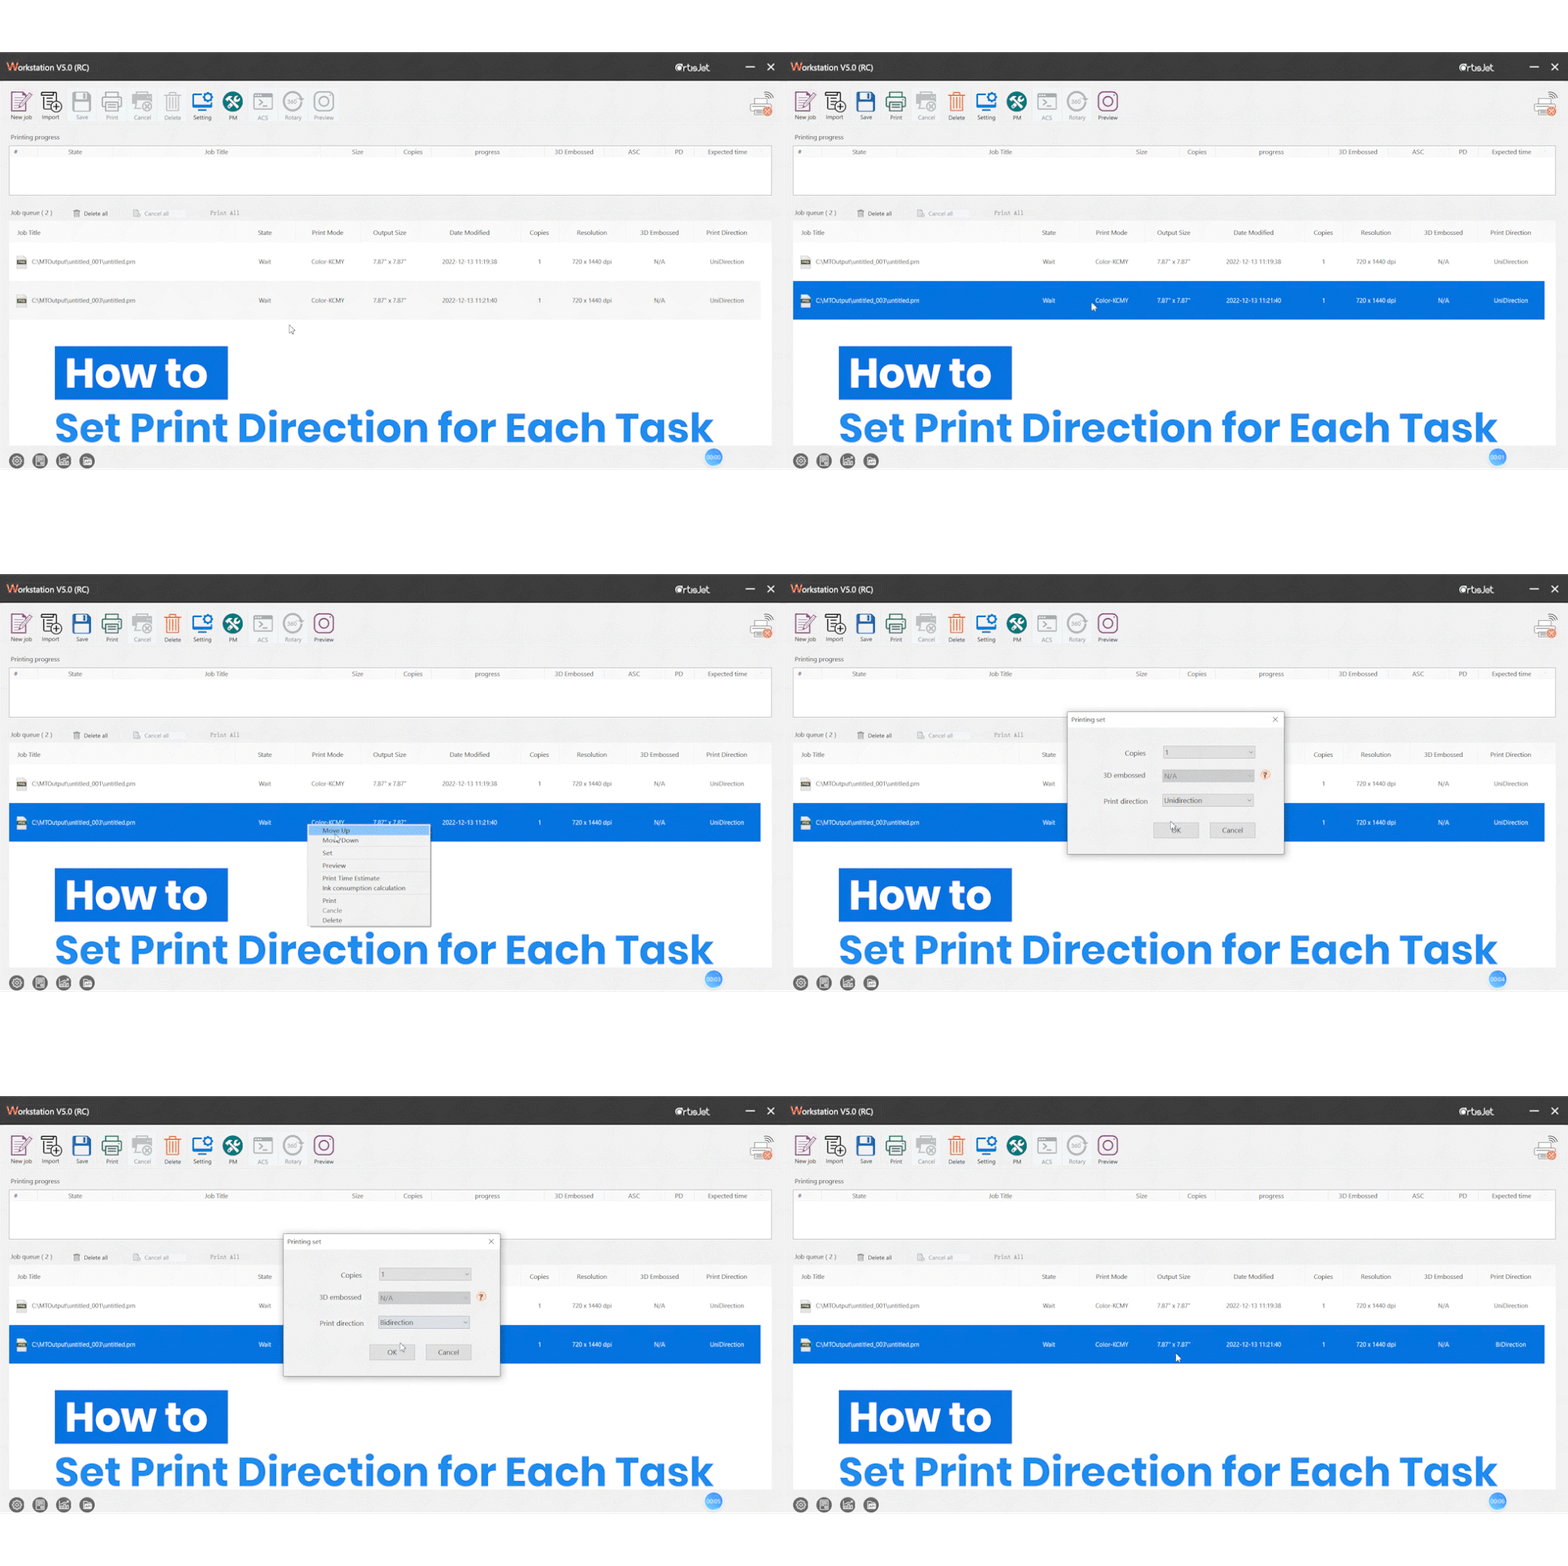
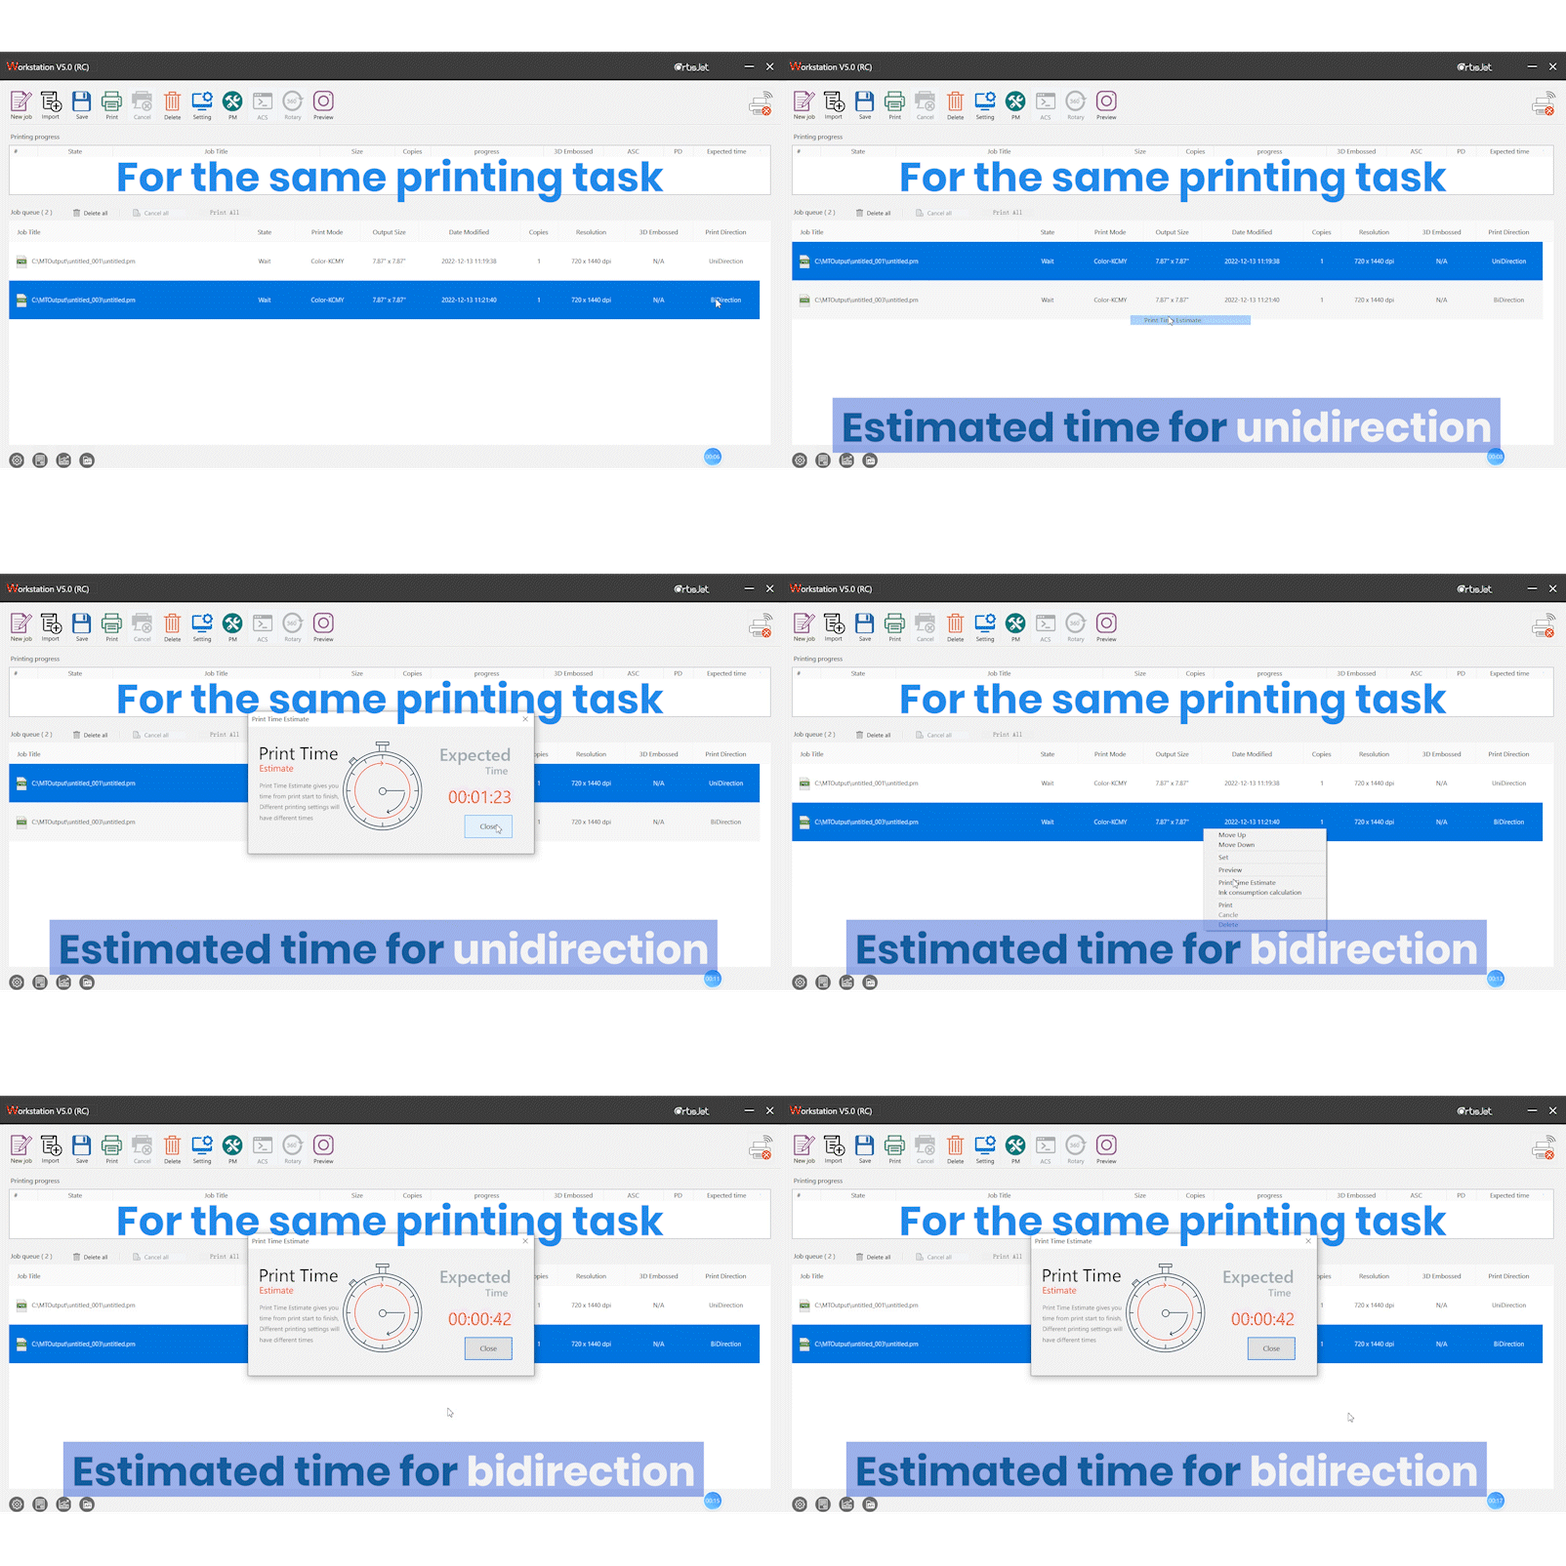
As shown in the second video, switching from unidirectional to bidirectional will reduce the printing time by approximately half.
Note that the increase in speed is likely accompanied by a decrease in sharpness. Although the difference may not be noticeable unless compared side by side with each other (uni vs bi).
Cutting the print time almost by half with the 4 / 8 / 16 pass printing setup
What does 4 pass, 8 pass or 16 pass mean? The number of passes signifies the concentration at which the ink is ejected.
With higher ink concentration comes higher color density and sharpness, resulting in higher resolution.
The most commonly used settings are the 8-pass options, since they strike a balance between speed and quality, as tested by artisJet R&D team.
But dialing down to the 4-pass options can greatly reduce the printing time, in exchange for a slight drop in resolution.
This setting can only be adjusted in the RIP software. Watch the below video for the estimated time for different pass setting, as follows:
For the same printing task, you can print in 01:23 minutes with the 8 pass setup; print in 01:54 minutes with the 16-pass setup or reduce to 38 seconds printing time by choosing the 4 pass option.
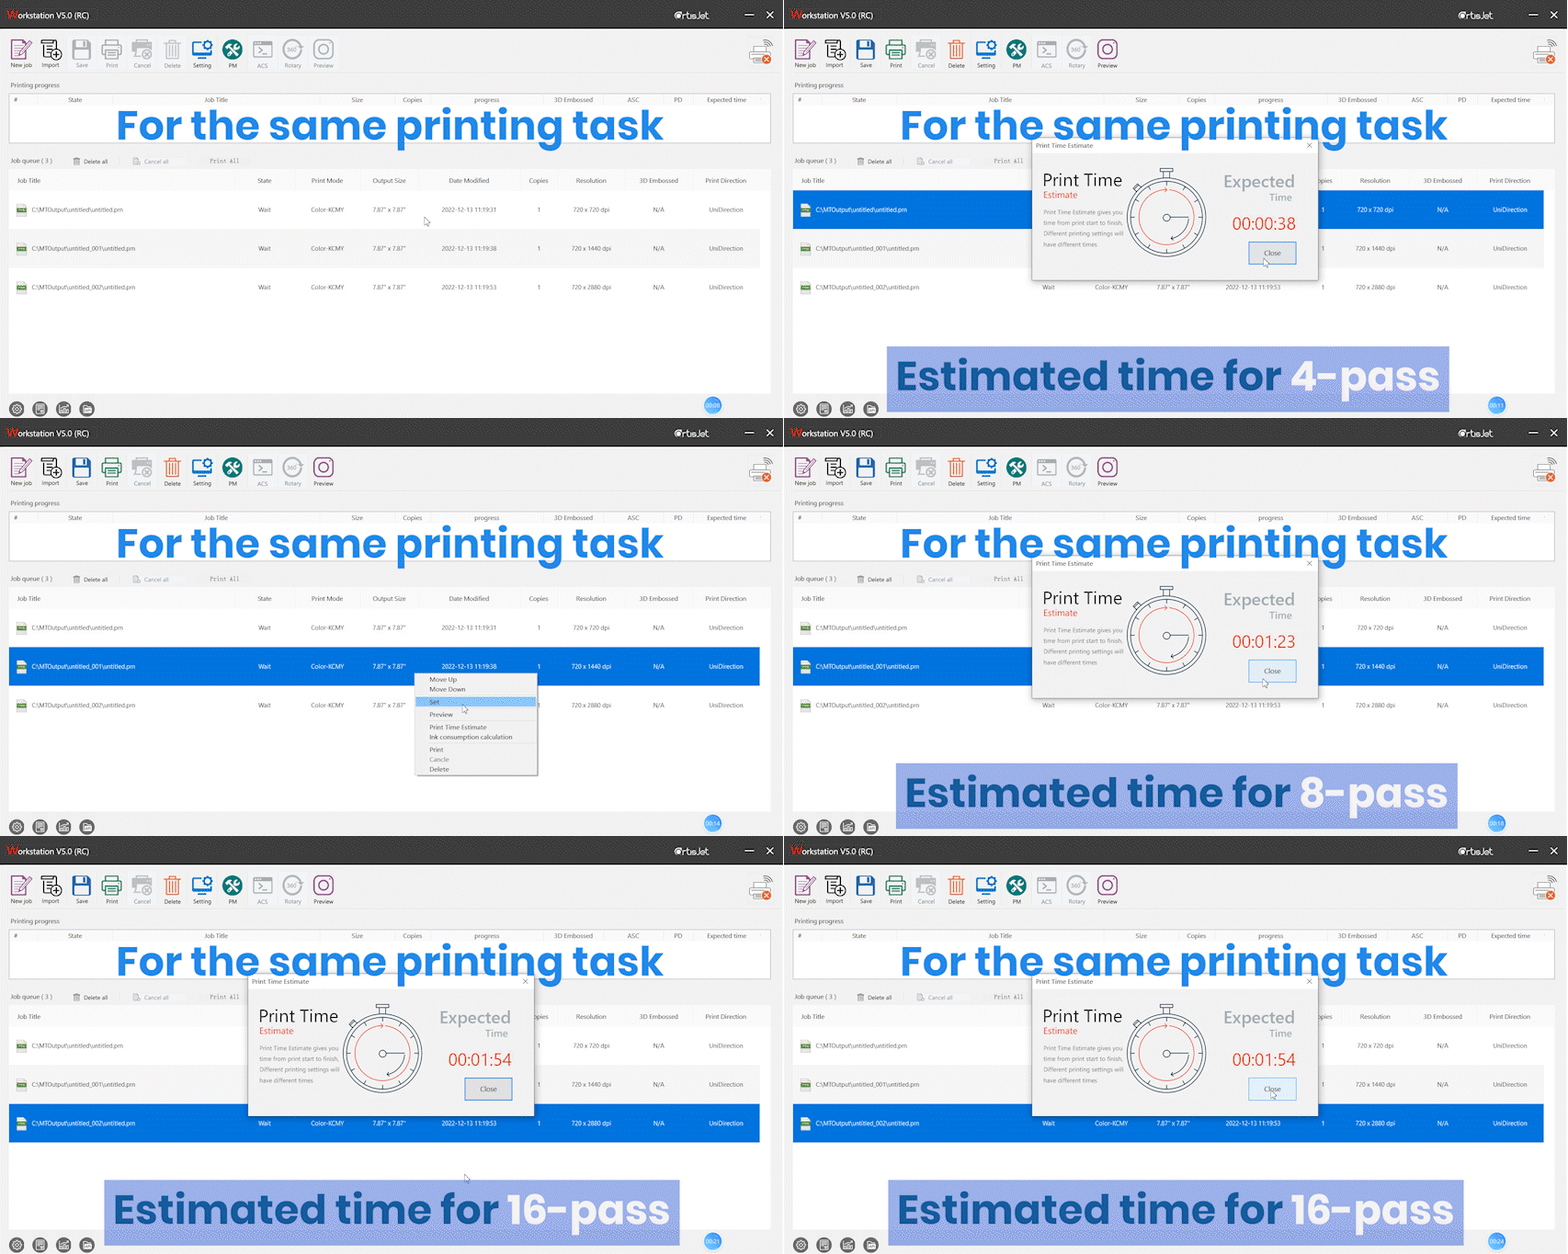
Other settings, including feathering (dither) and embossed effects, also indirectly impact the printing time, but by changing those settings, the final effects are invariably and visibly changed as well.
In conclusion, the fewer pass times, the faster printing speed and printing time. But if you are not on a huge time crunch, unidirectional and 8-pass options are generally good choices, keeping the right balance between printing speed, printing time, printing resolution, and therefore printing quality.
Do you have questions on how you can better benefit from different settings in the artisJet printing hardware and software? Give us a shout here and let’s discuss more, any questions are welcomed.
When you think of printer maintenance, what kind of words usually come to mind: laborious, tedious, troublesome? Does it have to be that way?
Watch our latest video and learn how to do Printer Daily Maintenance in just ONE CLICK – that easy! - with artisJet digital inkjet printing systems.
Stay connected to artisJet for upcoming maintenance and technology posts. Follow us on social media: artisJet Facebook page, Instagram, Twitter, and discover the wide range of printing solutions and printed samples on Pinterest and Flickr accounts.
Subscribe to artisJet YouTube channel for printing solutions videos, learn how to use artisJet software for different printing effects, discover video testimonials and maintenance video support to much more.

YOUR PRODUCTS TO PRINT
Technology developed from users’ demand and experience over a decade.
Since 2005, artisJet has been focusing on smart sizes of direct to substrates printers serving different industries, environments, products, and printing demands. The customers’ demand has been driving us to be better along the way.
Being smart, being dedicated and being professional.
We have never broken the boundary of keeping the printer in smart size, easy to use, simple to maintain, and long way to run to secure your investment in our devices. By developing own core technology in printing engine, mechanical structure, software, accessories, jigs , attachments and more, you will have everything about your print demand.
EASY AND SIMPLE
Being professional never means being complex with artisJet. While working with printing devices, you will need to be able to work with design software, RIP software and output software. All sounds complex and challengeable, right? With artisJet workstation, you do not have to be a talent in every software at all.
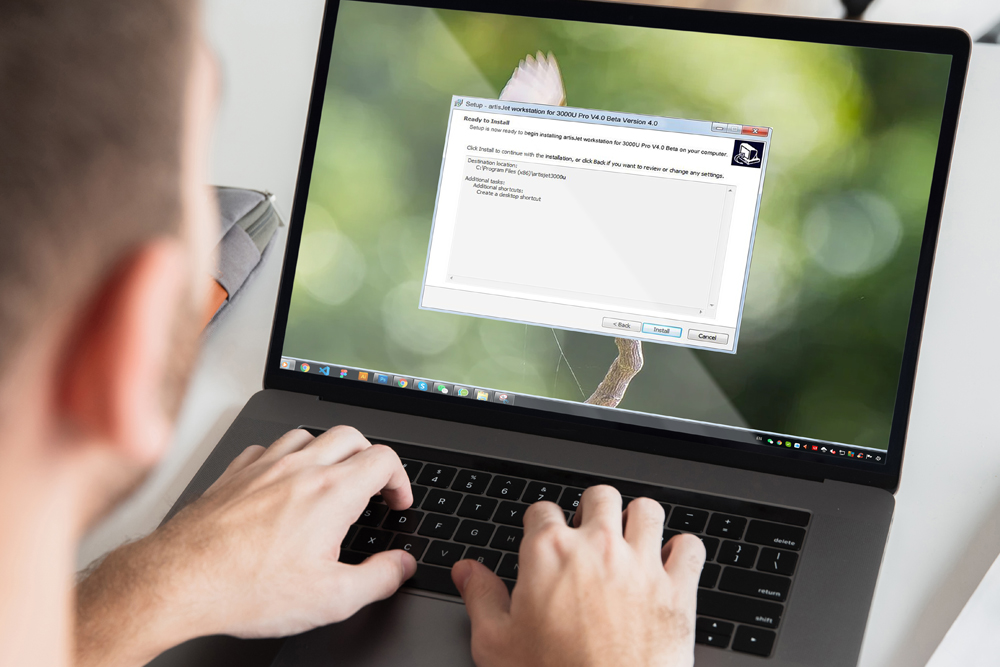
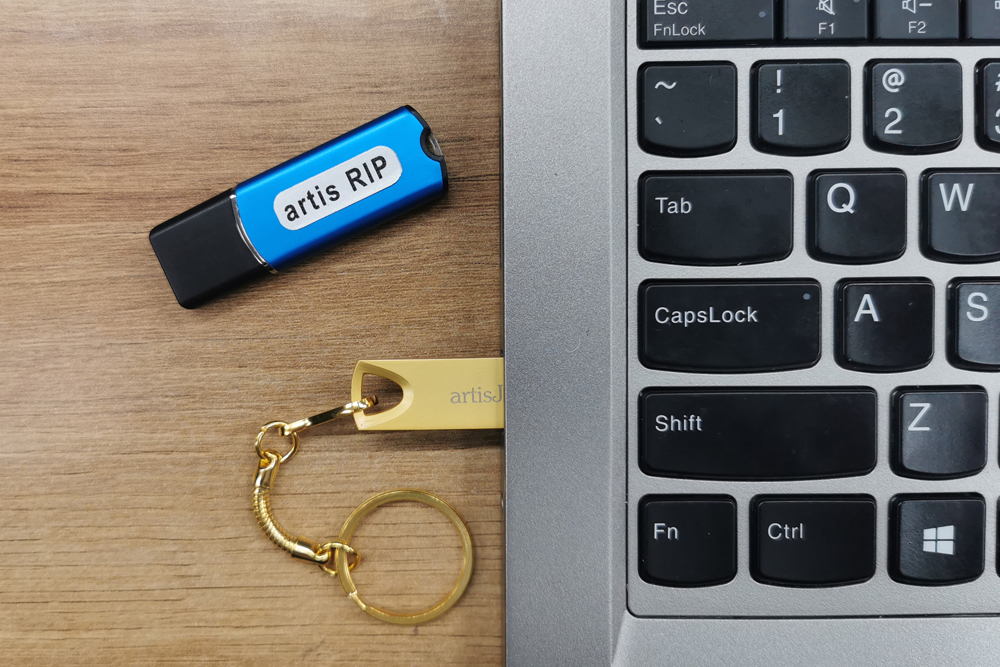
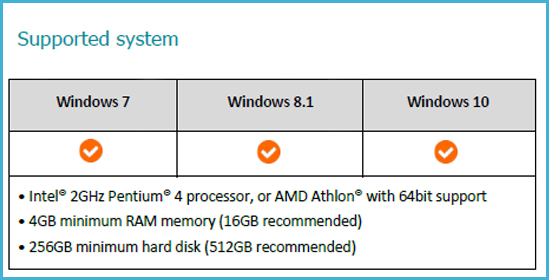
CLICK-TO-PLAY. artisJet workstation is a print manager with Microsoft digital certifications for your smooth operation. With a click to the INSTALL, the RIP software, workstation, virtual printer, and hot folder technology all are installed directly onto your computer.

CLICK-TO-MAINTAIN. Ink initialization and printer maintenance become simple. Get your very initial print done by “INK Charge for new printer install” and it will take you to print directly in 7 minutes and reactivate your printer after holiday by “Ink recycle”.
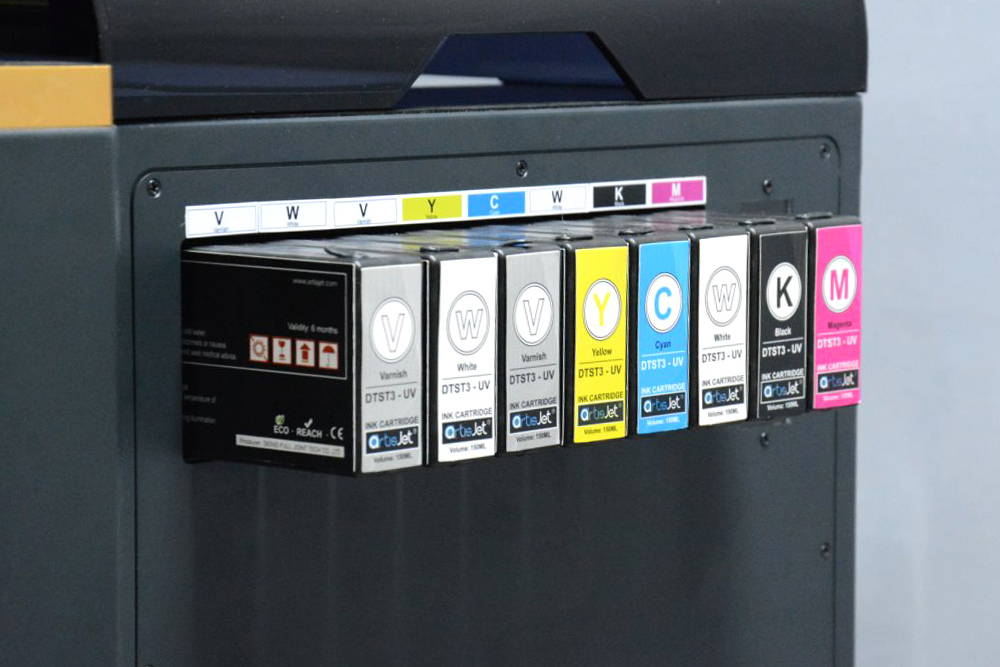
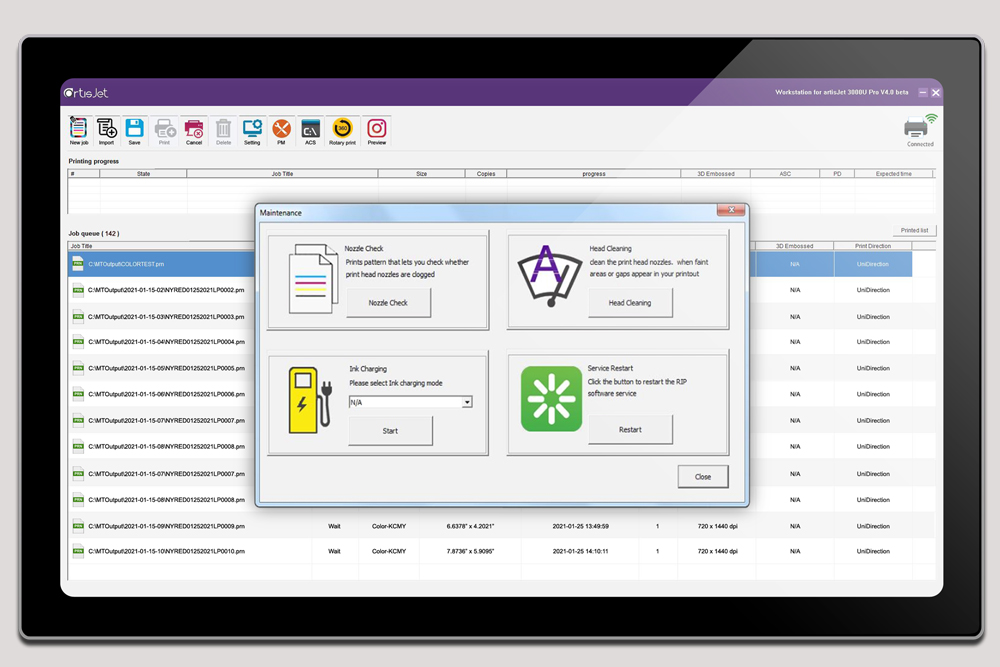
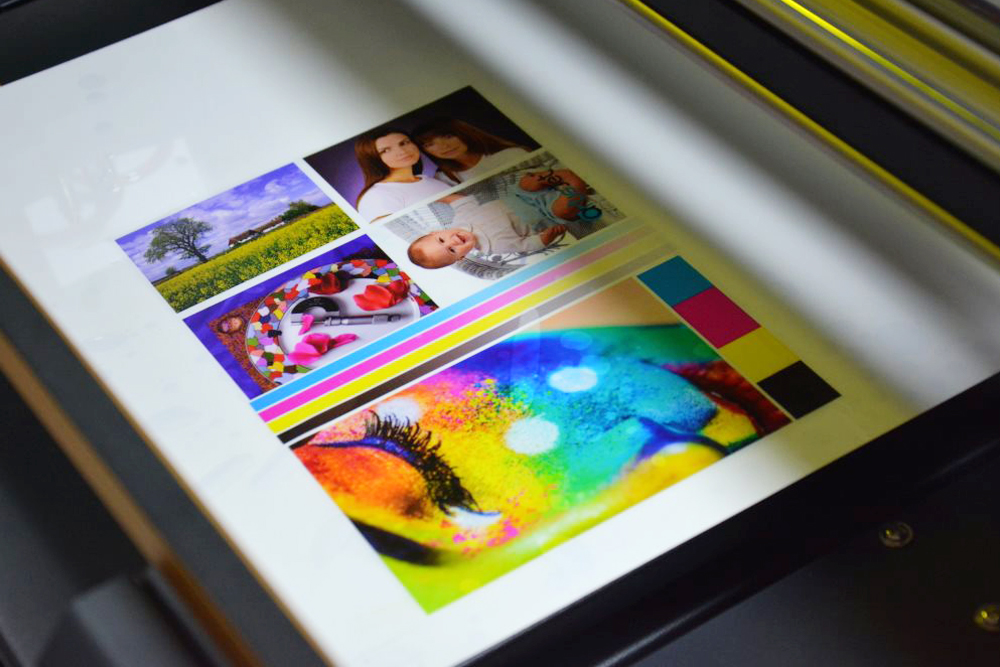
CLICK-TO-MEASURE. Automatic measurement of products height will always clear your concerns for product height measurement.
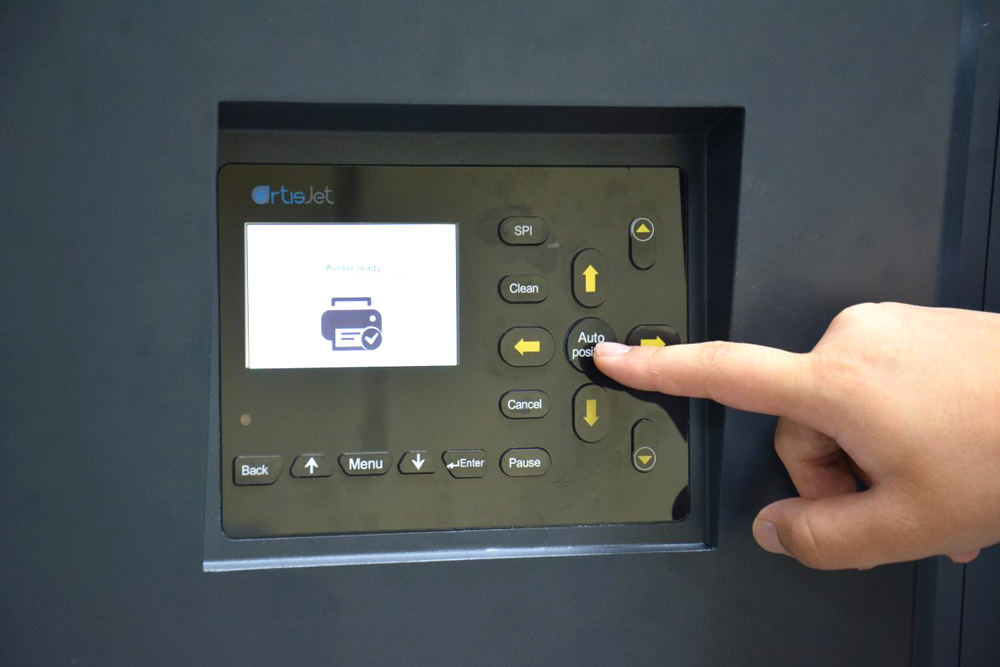
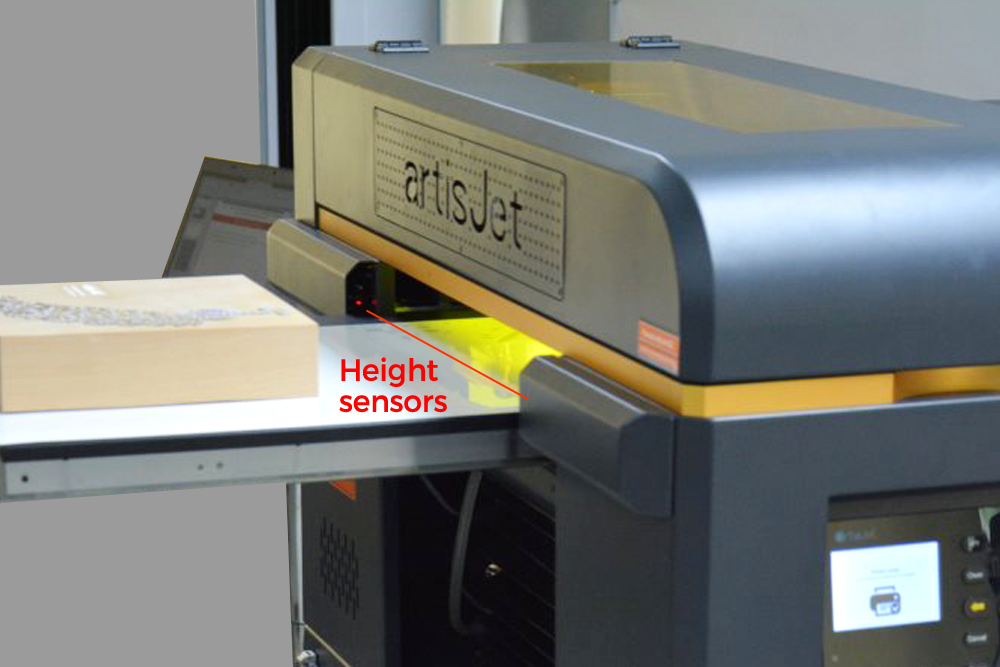
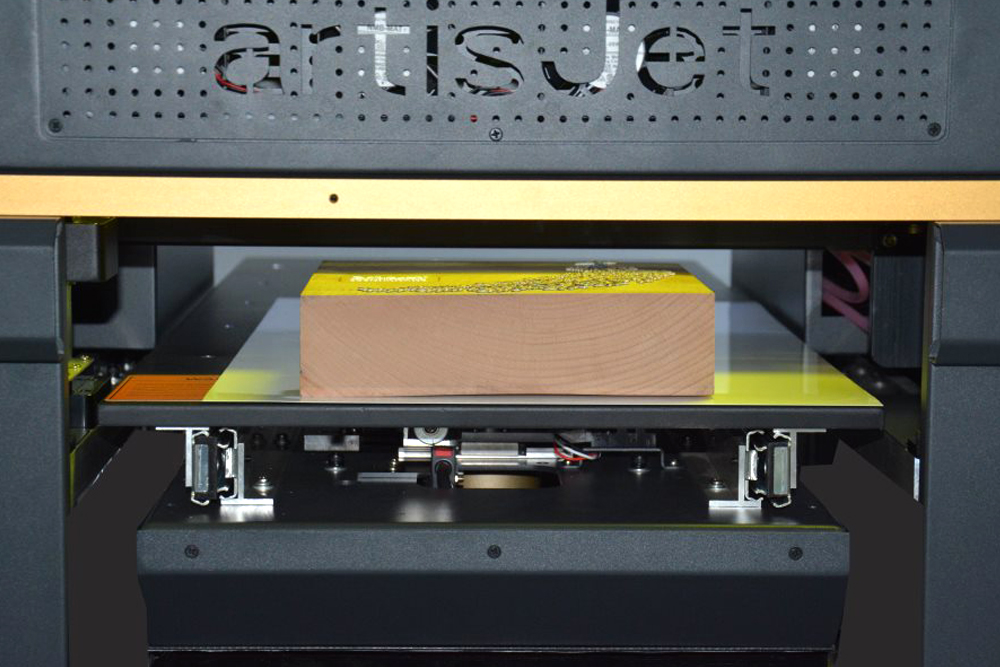
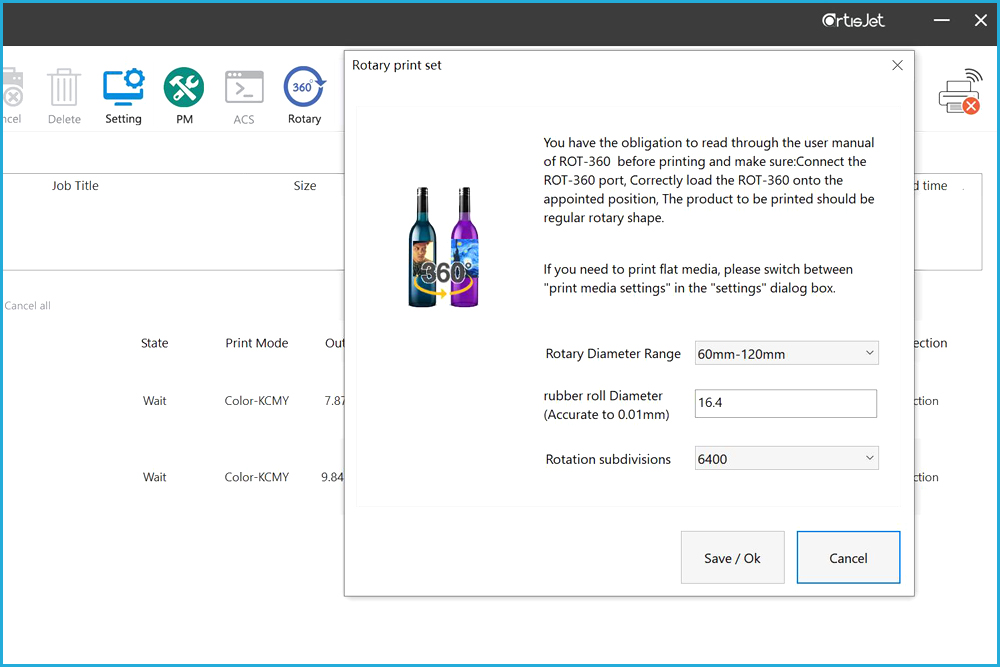
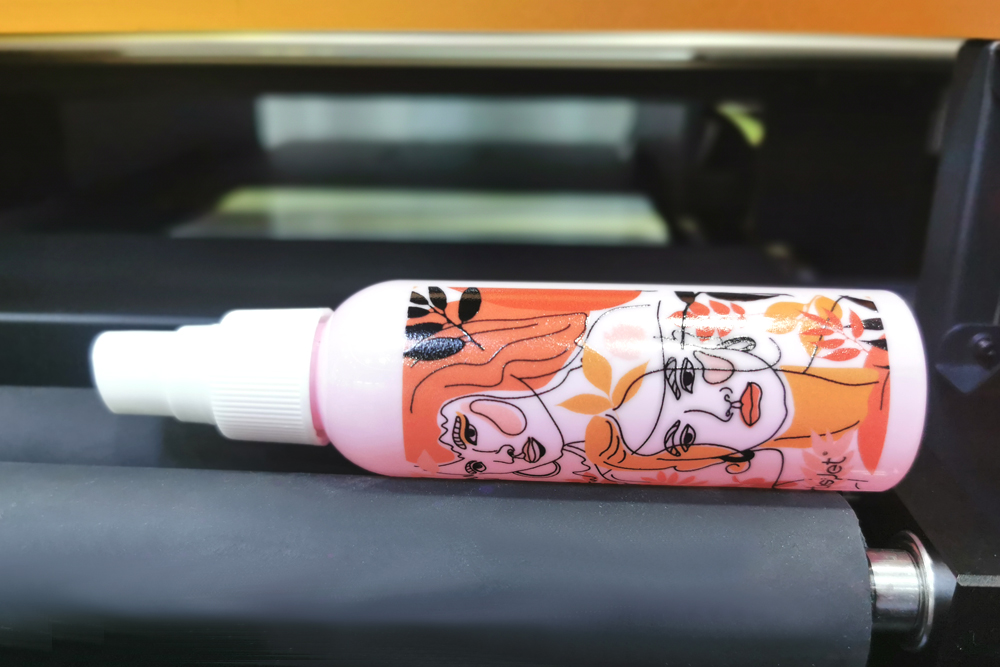
CLICK-TO-CONVERT. With a simple click, you will be empowered to move forward with the 360 print from flat surface printing with multiple options.
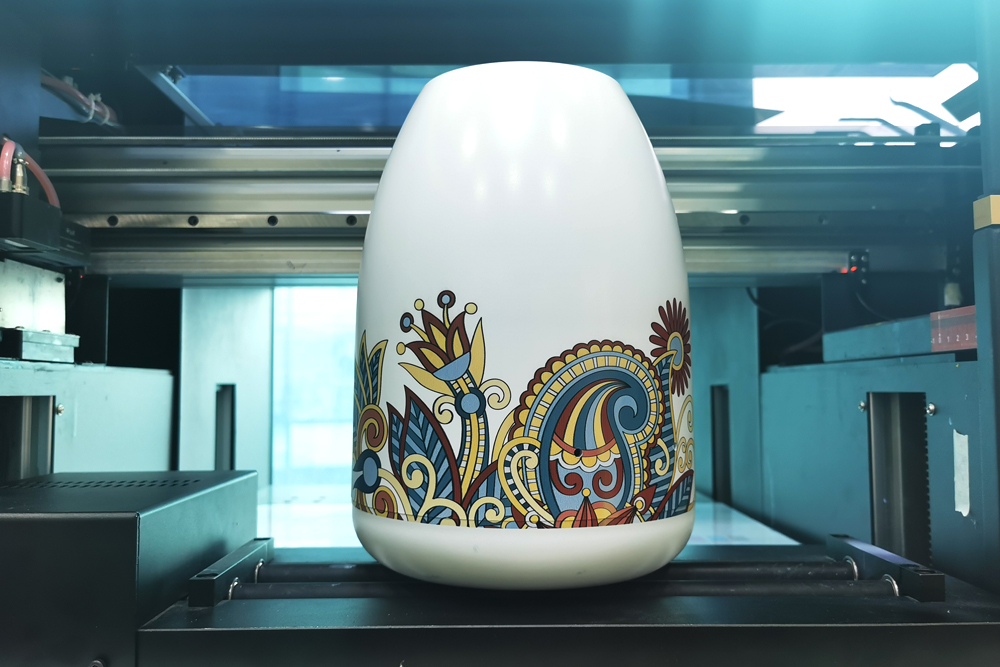
COMPATIBLE
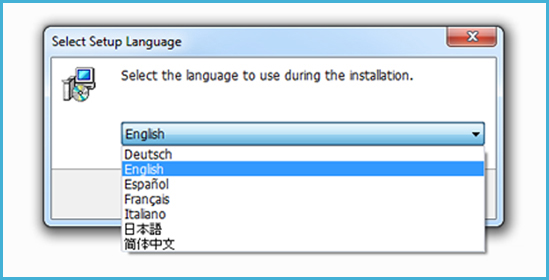
The compatibility for different languages for your easier understanding, different formats of designs and different products is important. Localize with your familiar language in English, Spanish, Germany, France, Russian, Chinese, and more are coming.
Set no limit on artwork formats. Empowered with artisJet Workstation, you will manage all of your artwork in jpg, PDF, tiff, PNG, Adobe, eps, psd, etc directly.
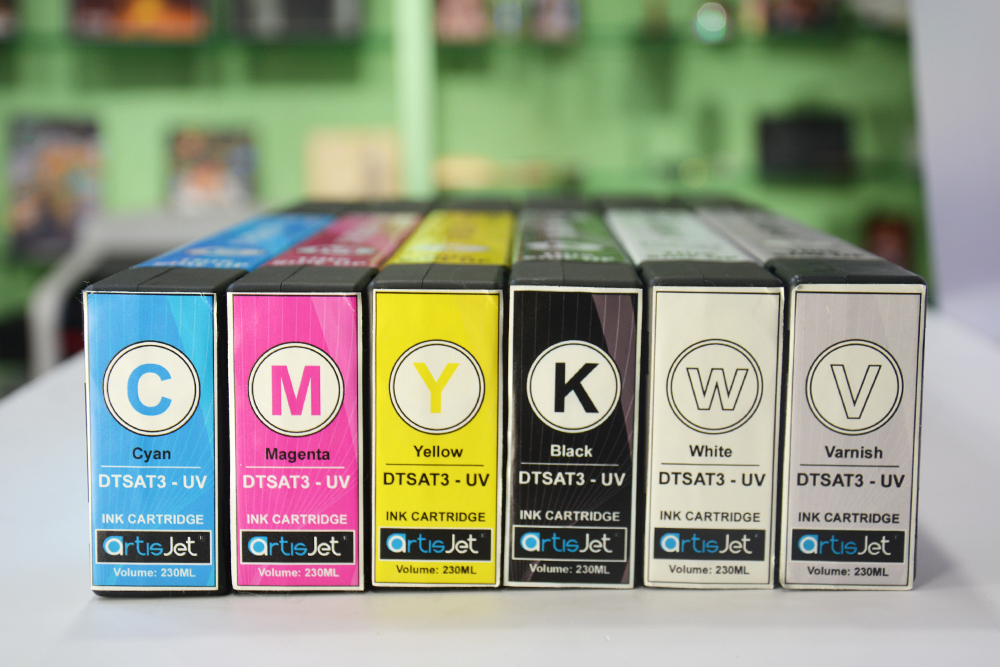
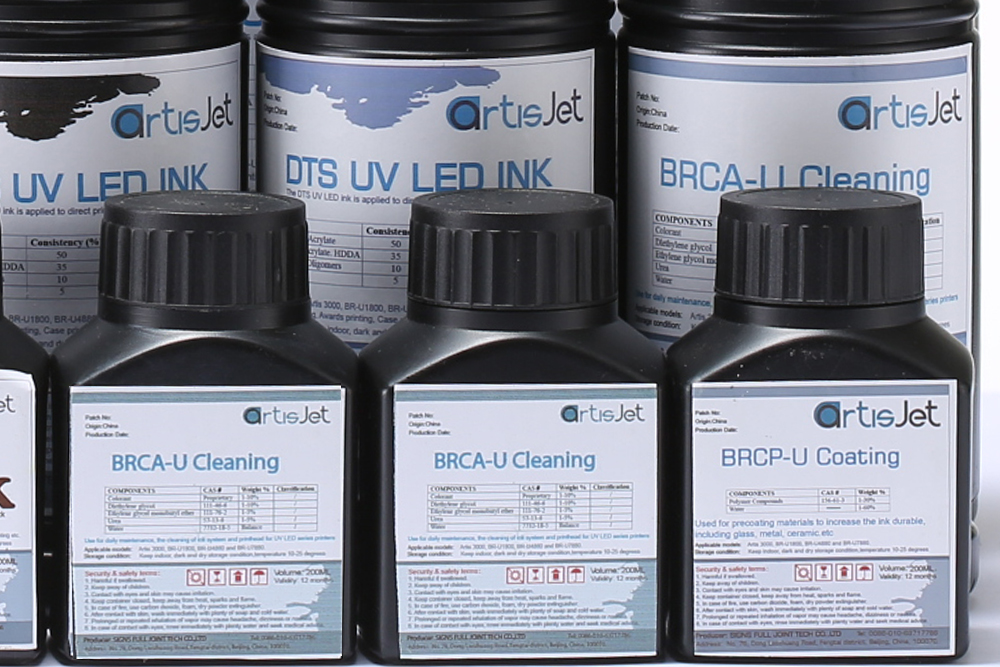
Unlock your imagination on what you can print with proper solution. DTSAT3 ink is strong for different hard or stretchable materials (such as balloon printing), but the color durability varies. With artisJet R&D, we have been developing different solutions for the best color performances with each single solution even for your specific demand, regardless the type of substrate (aluminum, metal, stretchable material, thin plastic sheets etc.).
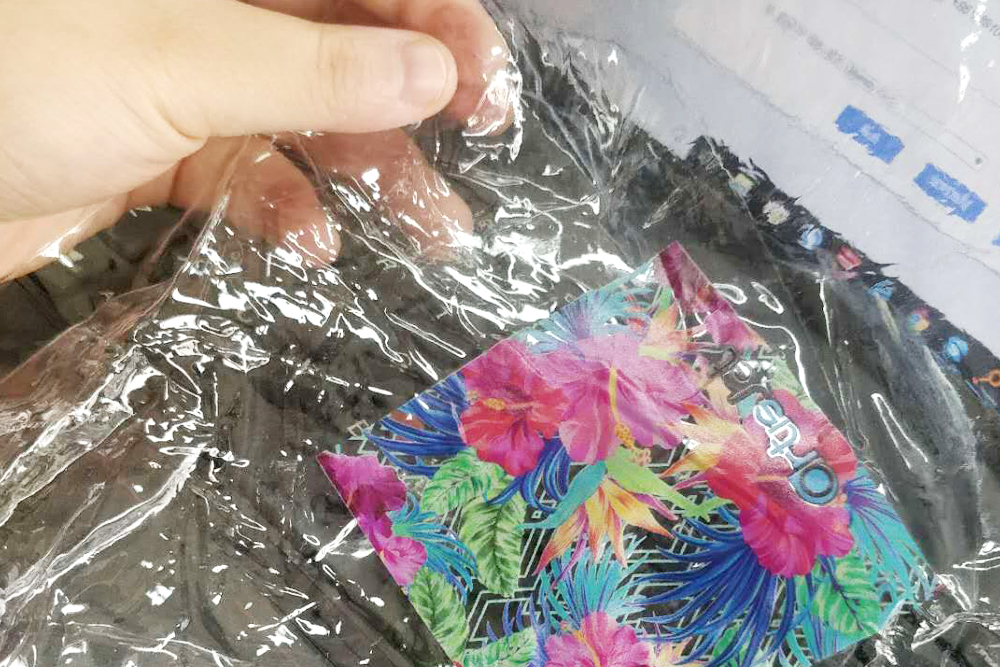
Directly output from third party software. Supported by latest technology in print engine to work with CAD, PHOTOSHOP, COREL DRAW, etc., artisJet Workstation accelerates the printing process directly.
COMPATIBLE
Being preventative. With the 7 steps to initialize your printer every day, the printer itself will have its own self-condition check clarifying the condition of encoding system, position limit system in four directions, ink pumping system, and table movements. The error coding system will always locate the exact problem if any before you start your print day.
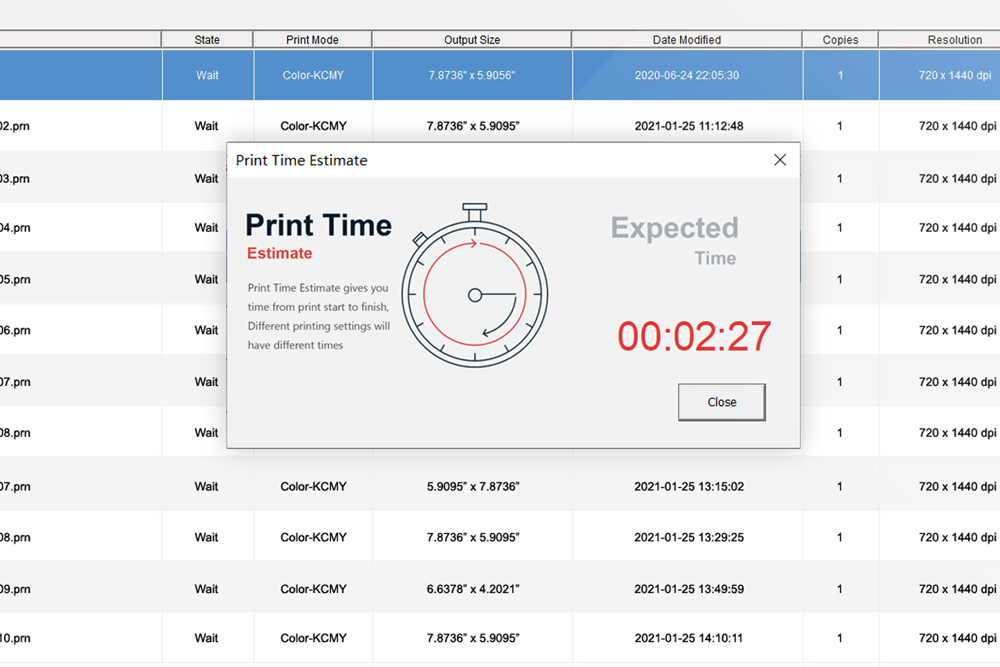
Being measurable. Keeping in mind that you always need to have a scientific and visible management of your business for the very best offer to your clients to maintain the better financial performance, artisJet develops the powerful tools measuring the printing time and inks to consume.
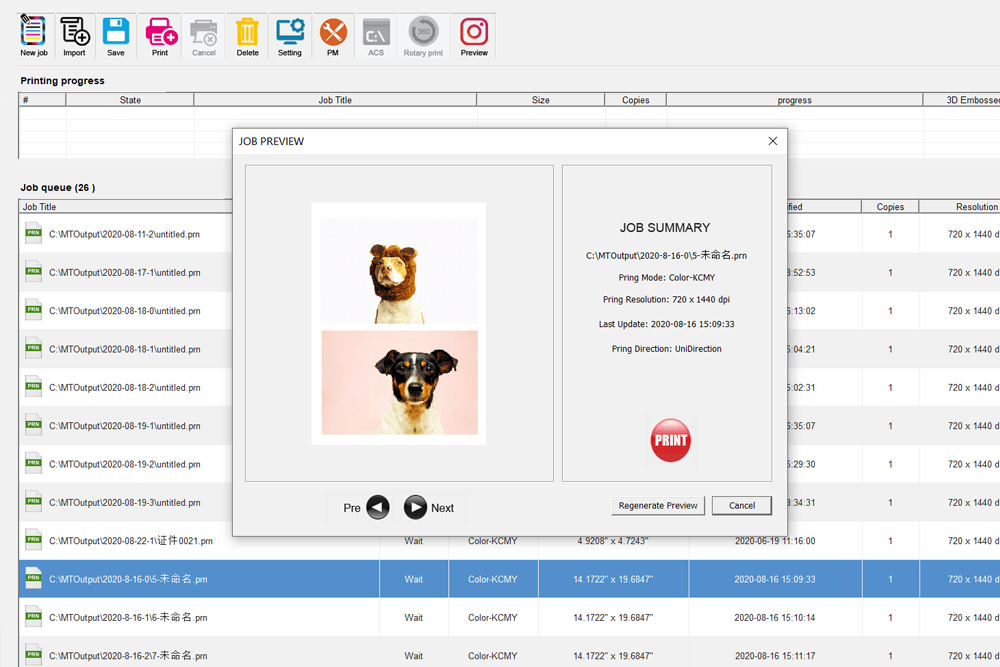
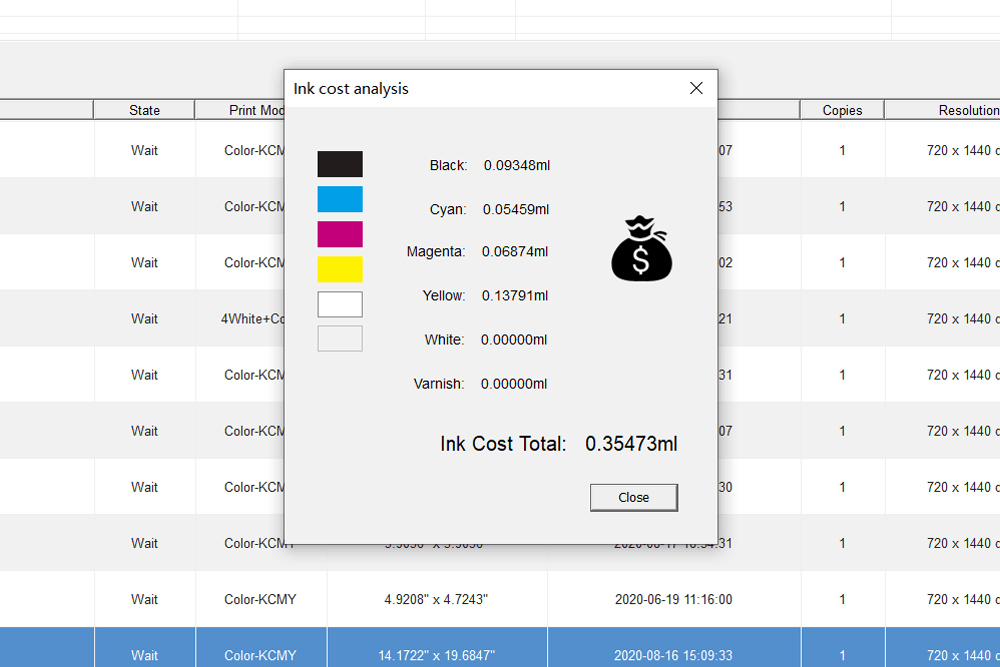
Being productive. Printing multiple jobs up to 200 becomes easier by setting copies directly in the software by one click and the ACS function offer a wide possibilities range on your print demand to have the printer fully automated.
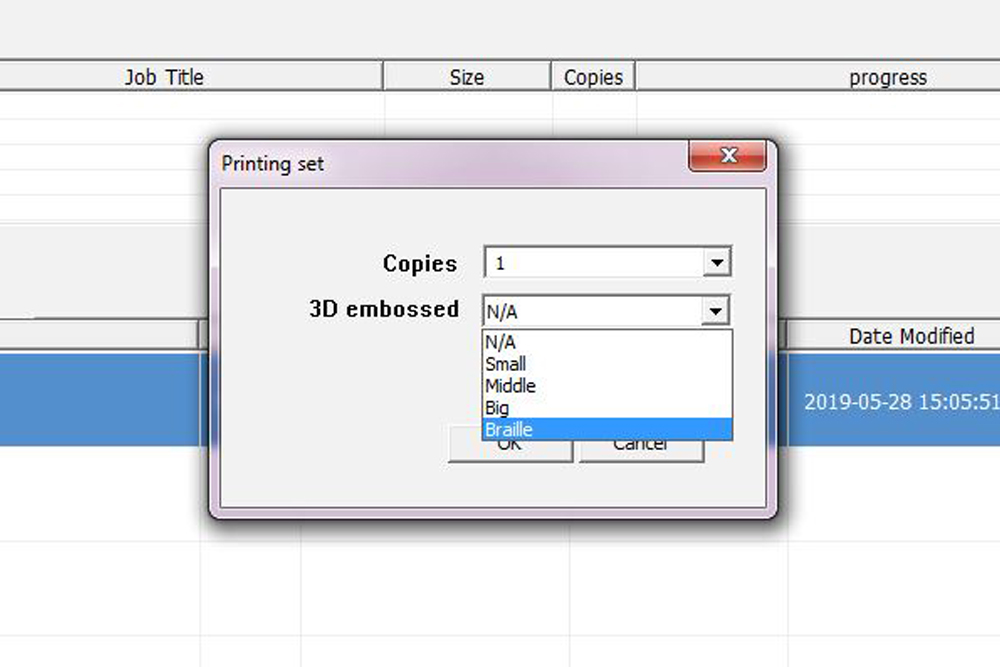
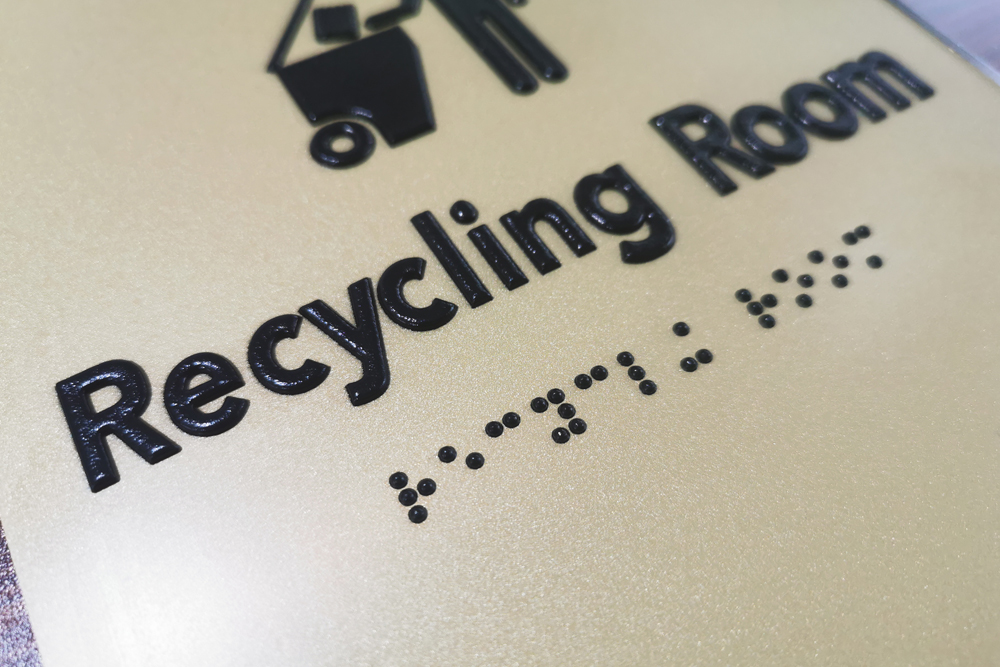
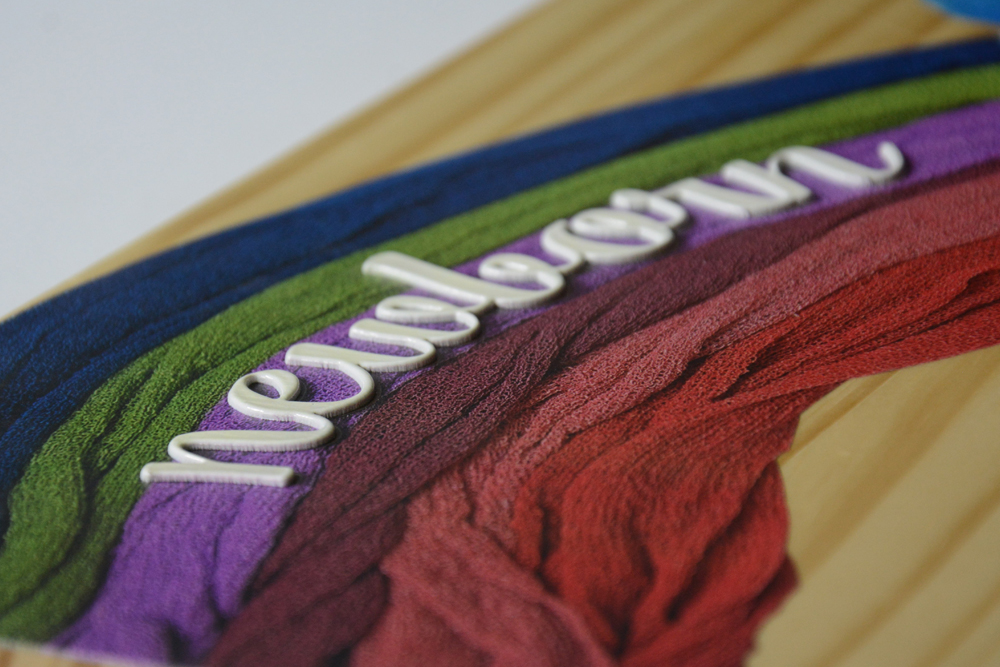
Being quality. With the professional integration between the digital magnetic encoding system built-in and software, artisJet printers will always deliver the best printing quality to your surprise in text vividness and color richness. Make your embossed and Braille printing at a click.
Being secured. Aligned with the company value and mission, all artisJet printers enjoy two years warranty and services. We care about your experience in the whole journey working with us from 0 to 1 and we keep commitment.

Reach out to us today for your own tailored custom print solution or instant personalization print solutions, for your brand, your event, your product and your store. Follow the 4 steps here to better understand how can artisJet assist you with your specific business needs: 1. Reach out and rise your printing demands / business demands; 2. artisJet provides you with printing solutions and printer selection based on your needs; 3. artisJet provides sample printing according to your products; 4. Evaluate the printing solution. Evaluate samples effect and quality. Evaluate artisJet printer and price. We are here for you via Live Chat, by e-mail, by phone and direct messaging.

Find out which printer is the best for your specific industry, printable products, environments, and business growth plan. To be empowered by artisJet printers to materialize your ideas, to enhance your production efficiency and add more value to your brands anywhere, anytime with more ease.
FACTORS THAT MATTER TO YOUR SELECTION
YOUR PRODUCTS TO PRINT
What is the exact product or objects you want to print? Are they printable? How about the printing quality?
1. The product size and printable size you will print MOST.
You will have specific products to print, probably several different products to print in your mind. But their sizes of the products matter a lot. While measuring the size of your products you will need to keep in mind to measure:
Product Height: the highest point to the lowest point;
Product Length and width: From Edge to edge;
Curved print: The highest and lowest point distance should be within 5mm on the surface to print. Otherwise, you might need attachment example, like the case of 360 degrees rotary printing on cylindrical objects - check video here.
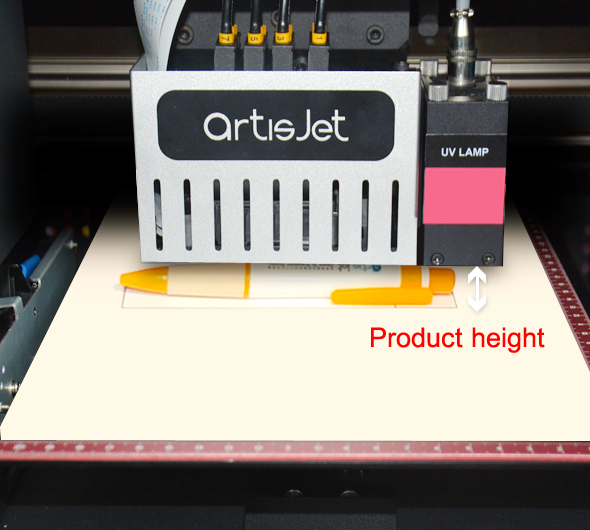
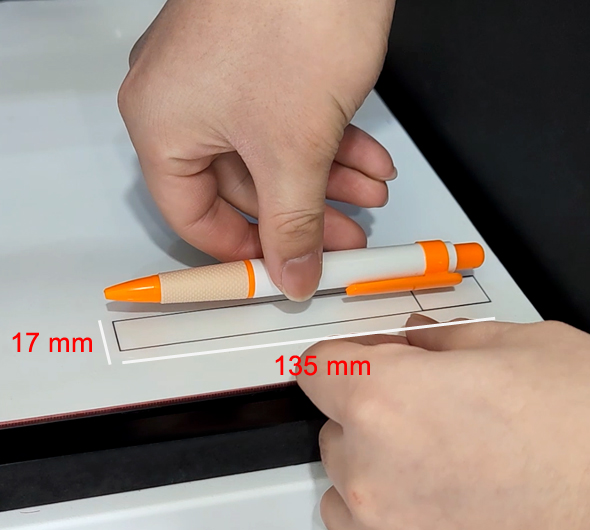
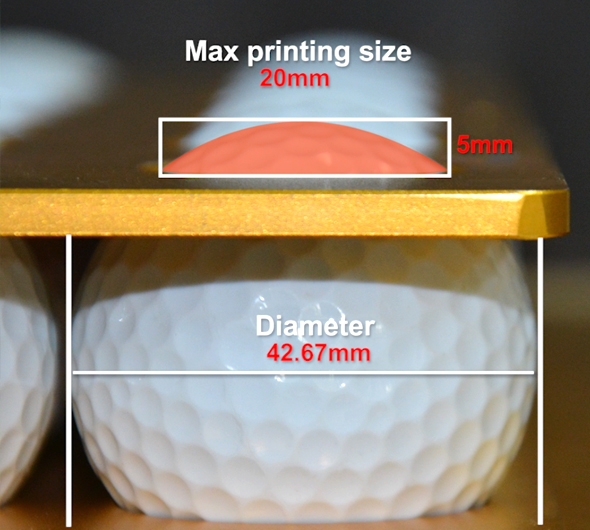
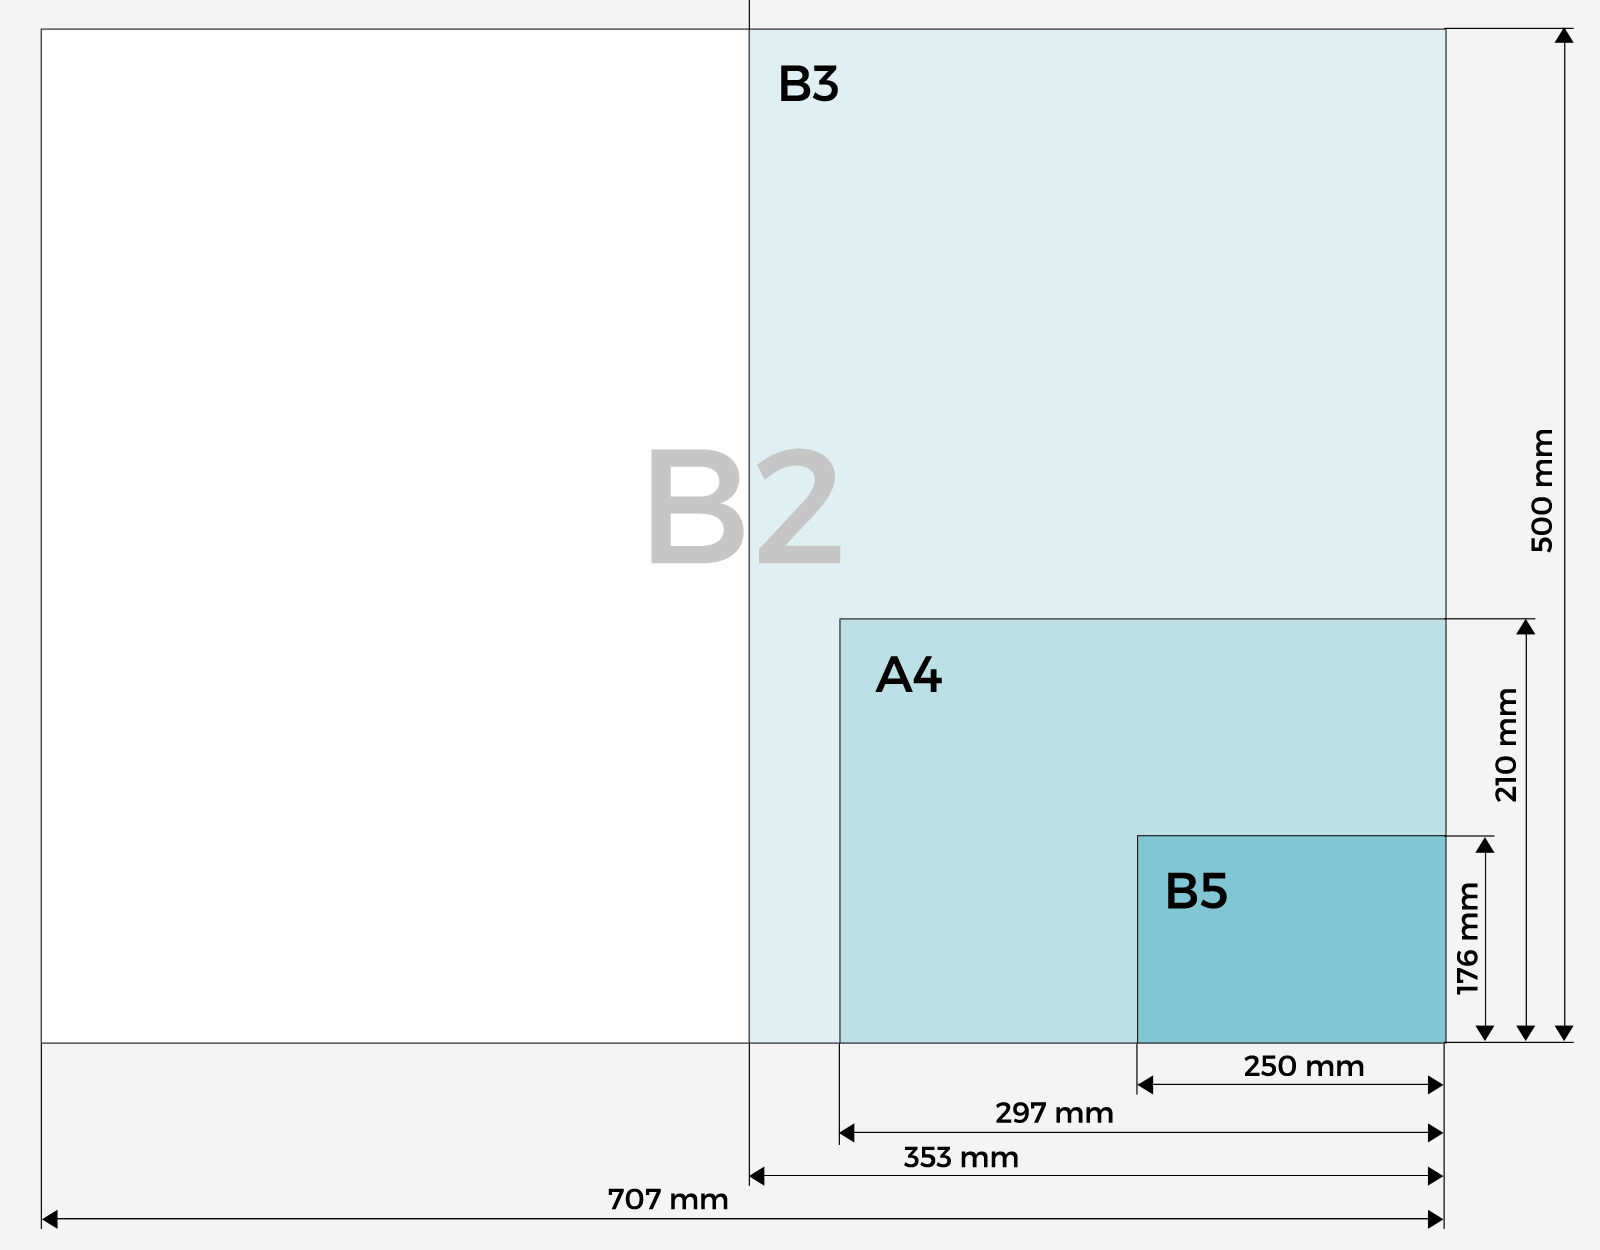
You can find A4, B3, B2, B5 application-oriented printers.
2. How your product buyers will use the printed product?
The consideration of how the product will perform and how the expectation of your customers is are important to secure your business success. The products will be used as EDC (Essential Daily Carry-On) or it will be displayed as a part of the decoration or outdoor signs? Because you will need different solutions for different conditions for color sharpness performances, color durability performances, and printing effects.
SCENARIOS AND ENVIRONMENTS
Where you will work with your printer for production? Where will you use it mostly: in your production house, pop-up store, mall kiosk, production center or at home? You will need to consider about:
1. Your space size and the cost.
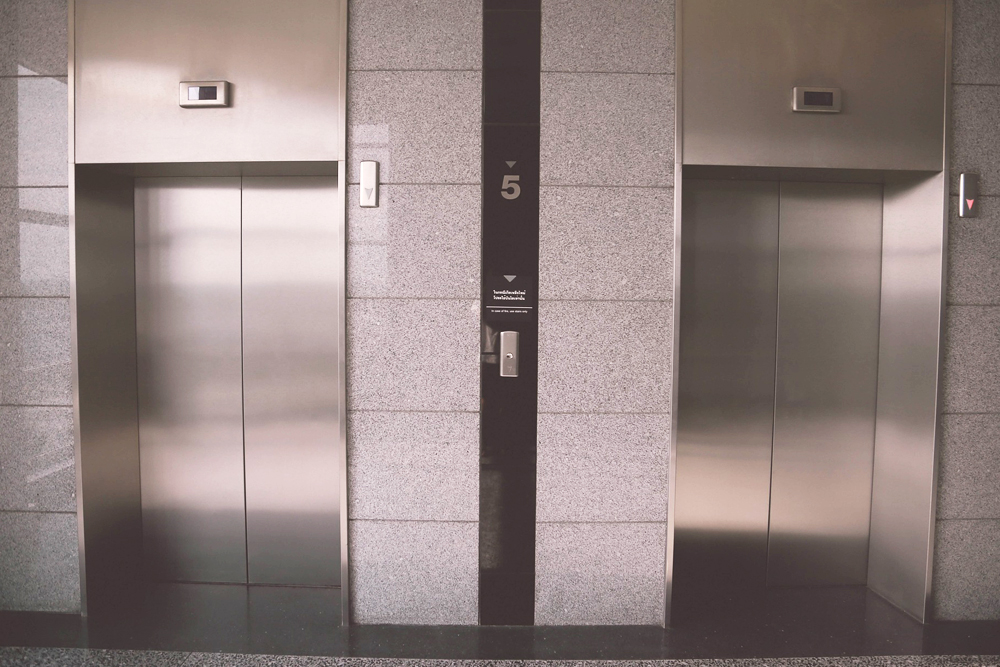
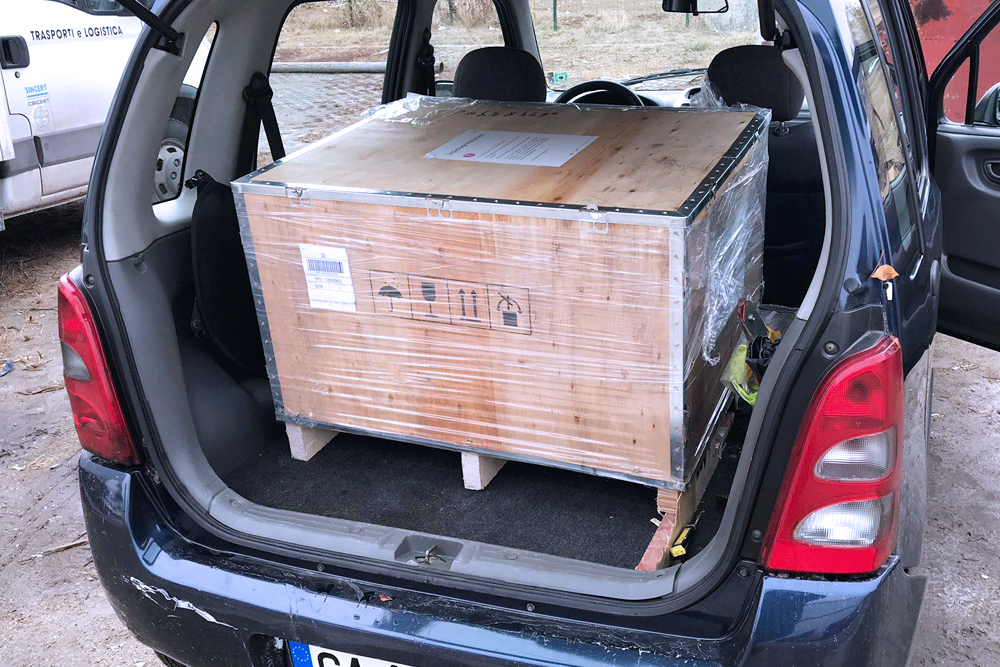
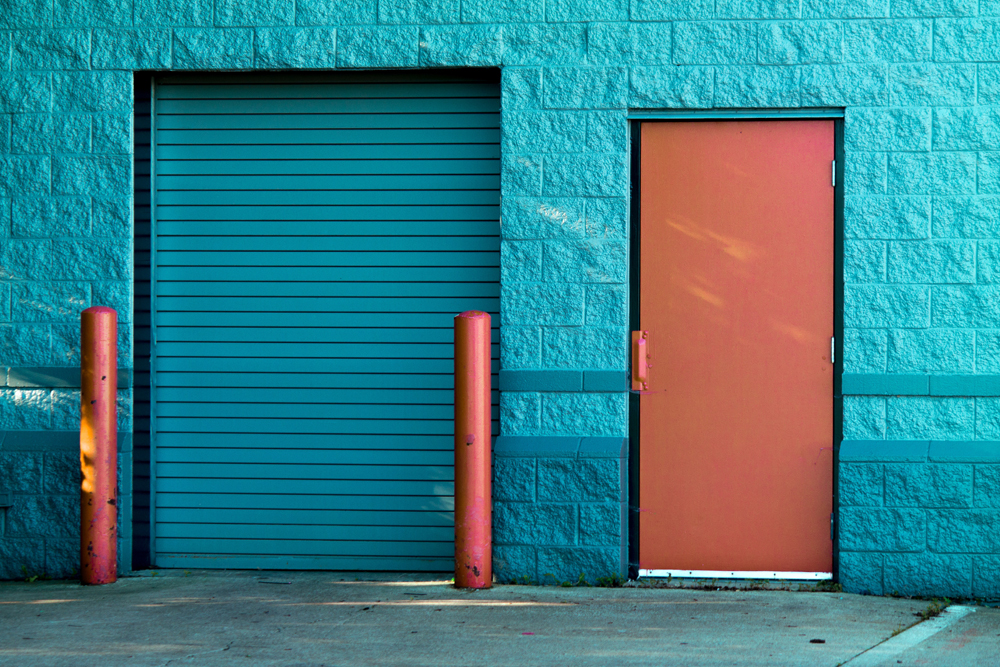
Your home room might be not big enough for printer with a size more than 90CM in body size as your door does not allow or even the elevator does not allow the entrance. The cost of same size space in Macy’s and a factory is completely different.
2. Safety and security essentials in your environment.
Malls have strict safety regulations for their consumers/shoppers in terms of physical hurt, smell pollution, and operator’s safety. While at home room or office room, you will also care about the smell and being clean. However if in factory or production house, you might have the whole ventilation system installed already which enables you not have to worry about the smell.
3. The mobility and flexibility.
Will you run the business in different locations or movable devices? Then you will have to take the printer foot print size into the consideration.
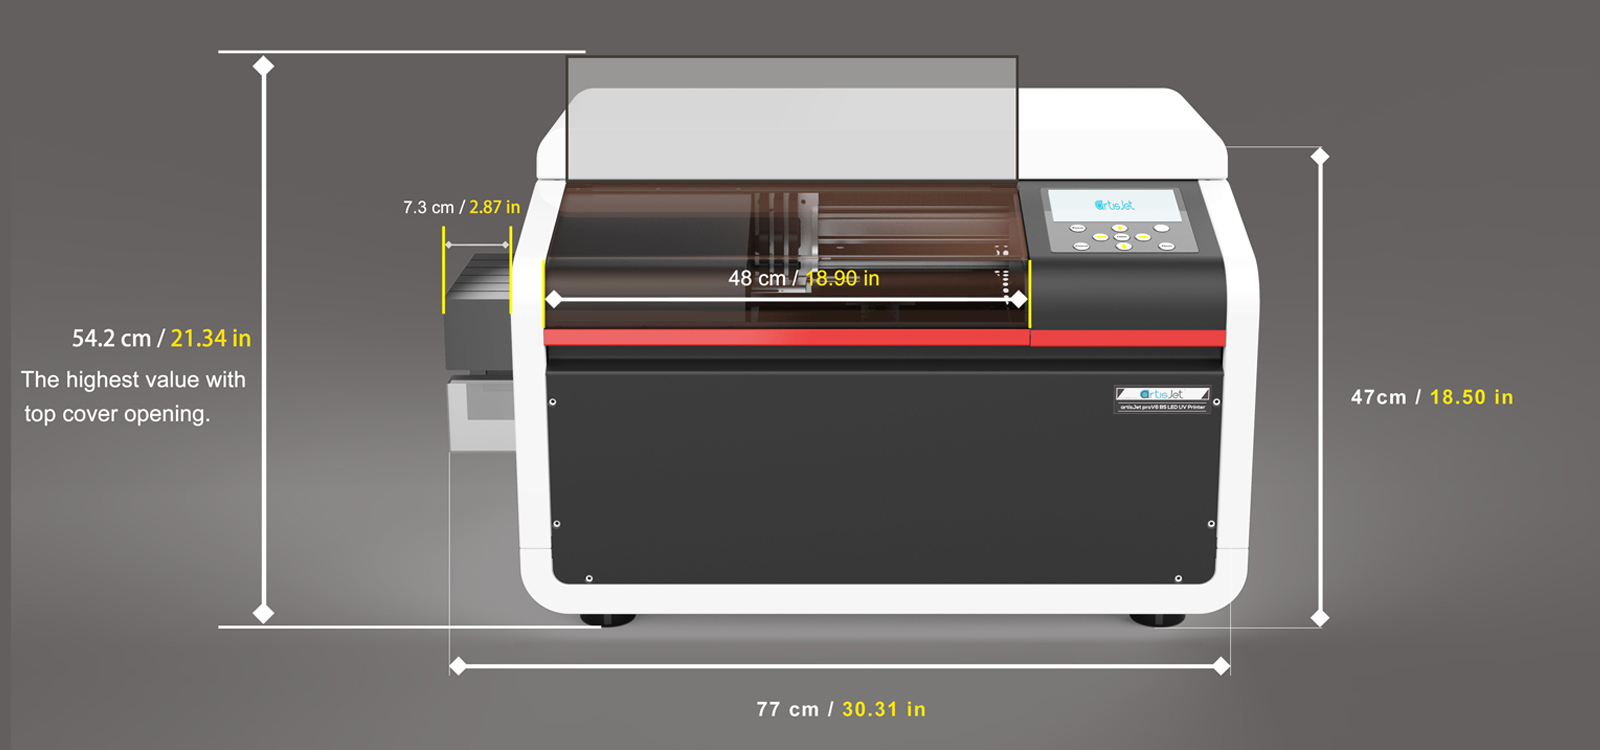
WHAT LEVEL OF HARDWARE AND SOFTWARE YOU NEED
Are you looking for a printer for short time run or for long time operation? To which level of maintenance work you can understand and accept to execute? There some budget printers needing more care with technical background and they are printers designed with simplicity in mind with less work yet for long run. Are you looking for a printer with a set of software that needs different steps of operation in order to print the task? Or you must have the software integrated with the software you are working with currently or the workflow you are having? Watch the video and learn what to look for when searching for the right printer!
THE PRINTER OPERATOR AND HIS / HER BACKGROUND AND SKILLS
You are investing in a device for success and a printer will need to have an owner to work with. So the qualification of your operator is an important factor determining the degree of your success. Is the operator you are appointing to the printer with computer background, photo editing skills, and printing experience? Do you need him or her be equipped with the above quality?
MATERIALS, PRODUCT COLORS AND PRINTING EFFECTS
Is the product in dark color or light colors? You will need to print a white layer onto the materials in dark colors as background. artisJet ECO-DYE solvent system does not provide white ink and the UV printers will be your choice if you need white. Do you want embossed or varnish printing effects? Embossed is technically printed from multiple-layering white ink printing.
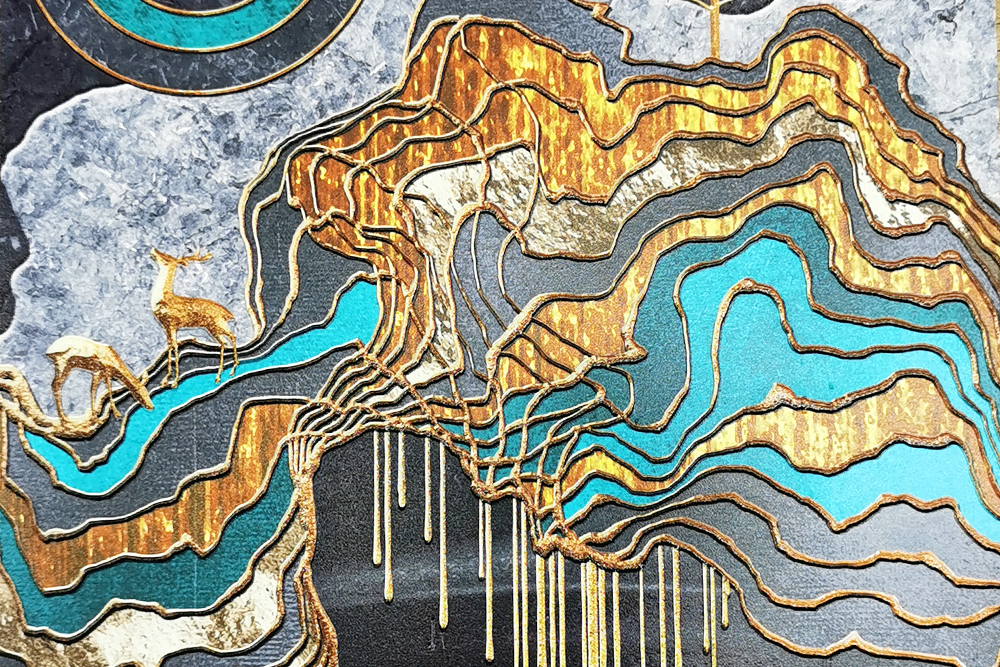
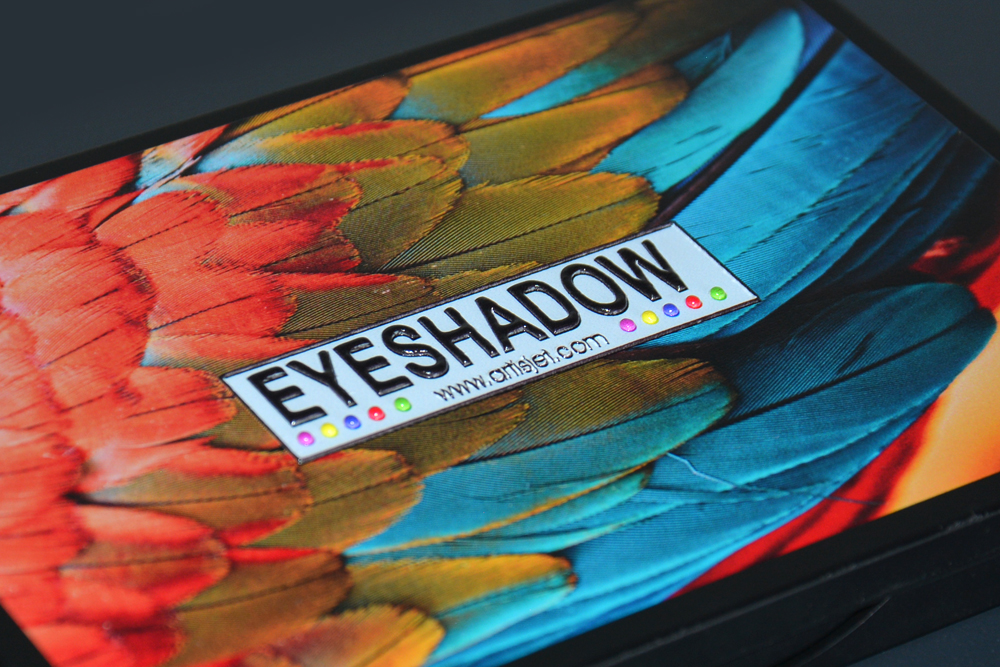
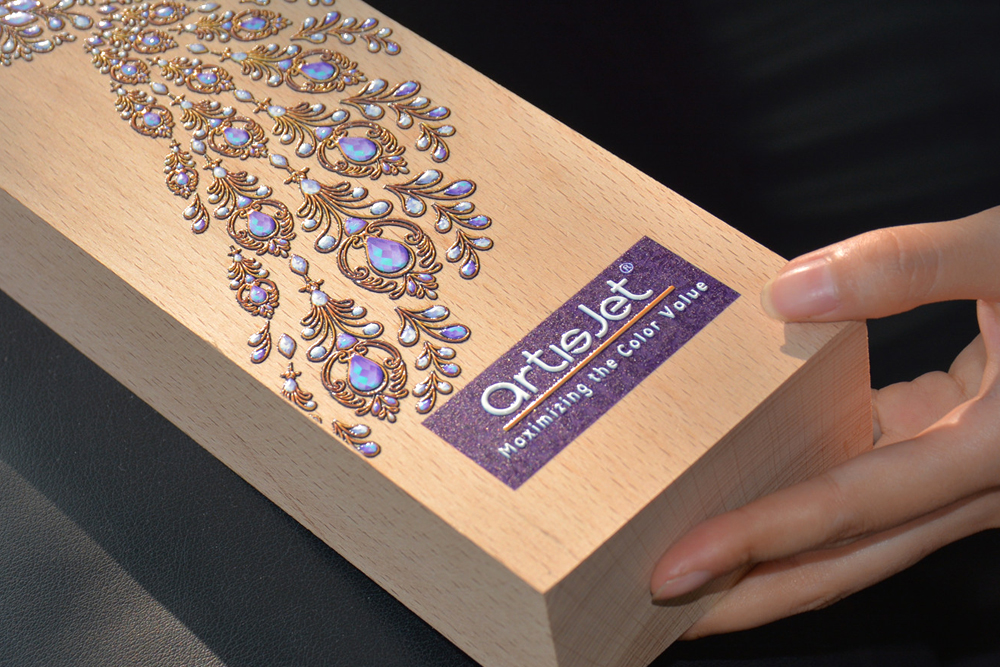
Which printers are good for embossed? artis 3000U pro, artis 5000U, and artisJet Young with CMYKWWWW printing channels. Varnish is famous for its color enhancement with shinning results or unique application for special materials. artis 3000U Pro and artis 5000U LED UV printers support varnish.
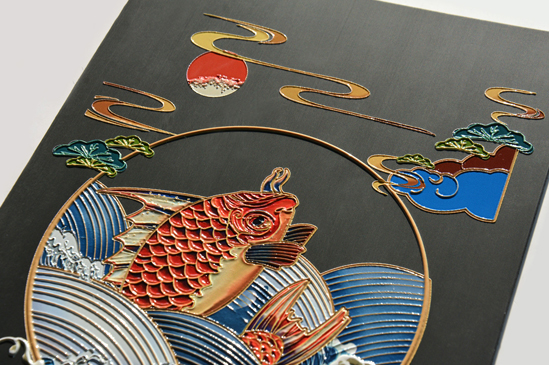
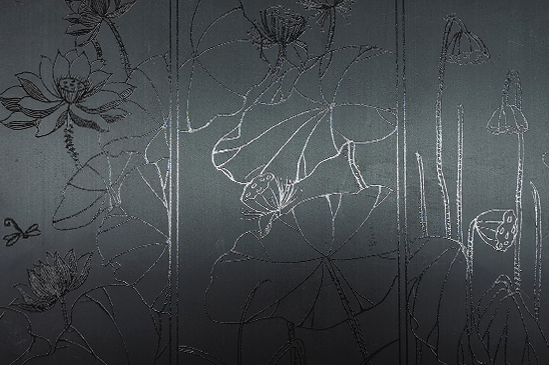
Reach out to us today for your own tailored custom print solution or instant personalization print solutions, for your brand, your event, your product and your store. Follow the 4 steps here to better understand how can artisJet assist you with your specific business needs: 1. Reach out and rise your printing demands / business demands; 2. artisJet provides you with printing solutions and printer selection based on your needs; 3. artisJet provides sample printing according to your products; 4. Evaluate the printing solution. Evaluate samples effect and quality. Evaluate artisJet printer and price. We are here for you via Live Chat, by e-mail, by phone and direct messaging.
WHAT IS ARTISJET ROTARY ATTACHMENT?
The artisJet rotary attachment was already introduced in a previous article. artisJet’s cylindrical device is a custom designed attachment for artis BR U1800 A3+ LED UV system, due to the printer’s maximum height adjustment up to 170 mm. The rotary device effectively fits the working area and is attached to the printer’s flatbed. The cylindrical device ensures printing on a multitude of bottle substrate materials and sizes: aluminum, plastic, metal, glass, opaque, transparent, small bottles or wine bottles, any type of bottle that you need to customize by digital LED UV direct printing.
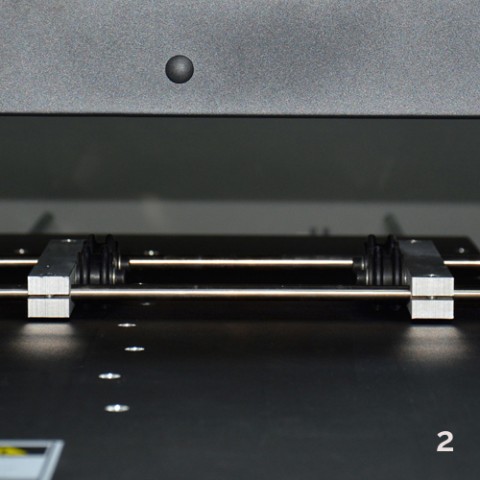
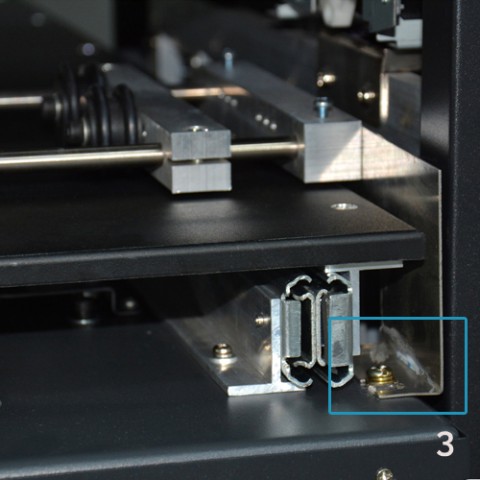
From a technical point of view, the rotary attachment has a simple design, which makes it easy to handle and user-friendly. What makes the bottle media rotate on the device? The artisJet rotary attachment is made of 3 major parts: silicone rollers (1), distance bars (2), and installation ports (3).
Preparation before printing: print principle and key points.
Print on cylindrical products directly with the rotary attachment by rotating the bottles through fixing the rotary jig on the working table. The print area should be regular subjects and the printing area should be the highest point of the bottle. Install the rotary jig correctly as instructed by artisJet user menu.
HOW TO INSTALL THE ROTARY ATTACHMENT?
There are 4 silicone rollers on the rotary attachment. These silicone rollers are the ones that drive the substrates to be printed through the friction force.
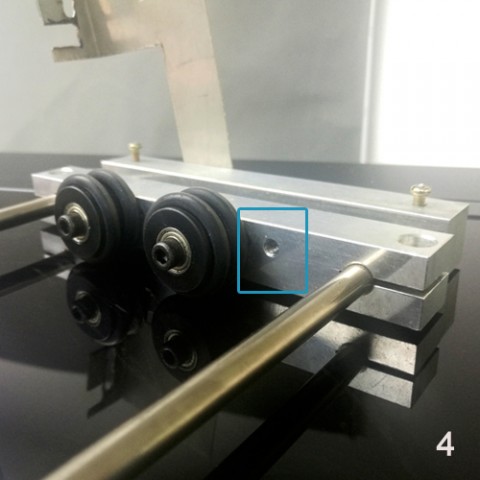
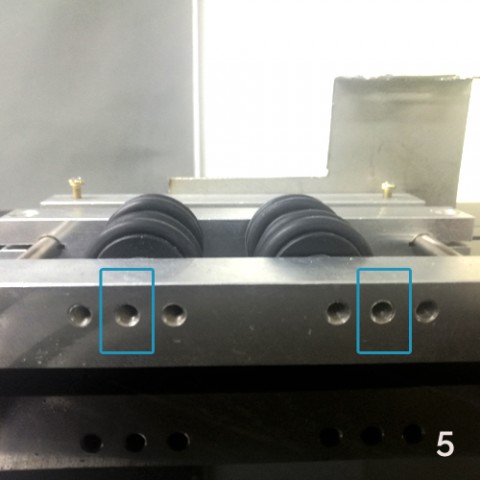
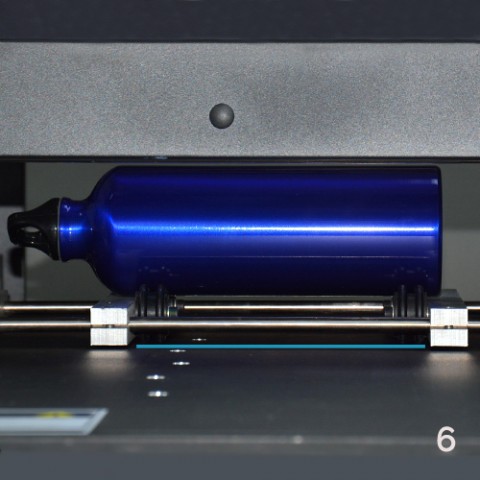
The four silicone rollers are fixed through the screw holes (4). It can be easily adjusted for different positions (5), depending on the bottle diameter. All four silicone rollers shall evenly reach the flatbed and rotate smoothly as the flatbed moves (6).
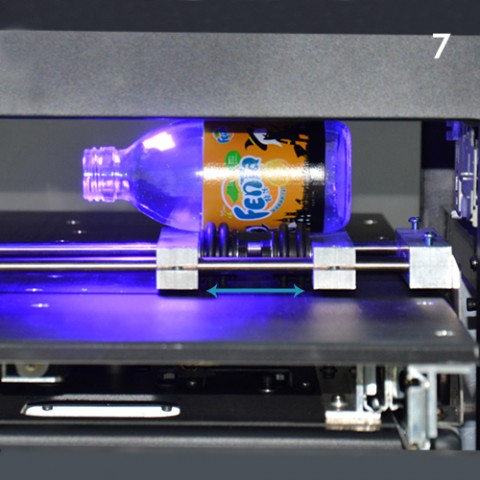
Custom LED UV rotary printing with artis BR U1800 accommodates cylindrical objects with a maximum print bottle diameter of 8 cm (3.15 inches) and a maximum printable bottle length of 32 cm (12.6 inches). Therefore, the distance bar it is for different sizes of bottles and it can be adjusted based on each bottle length for printing on demand: small (7), medium (8) or big (9), up to 32 cm in length.
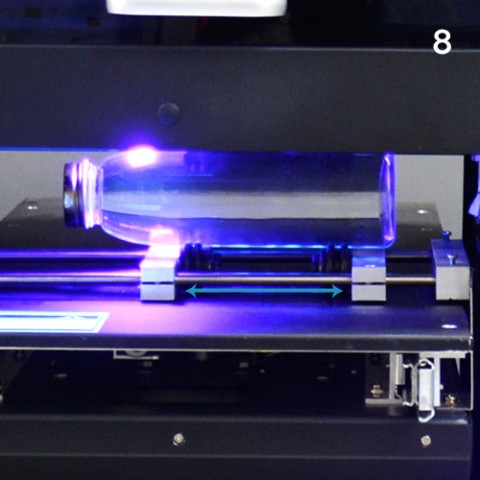
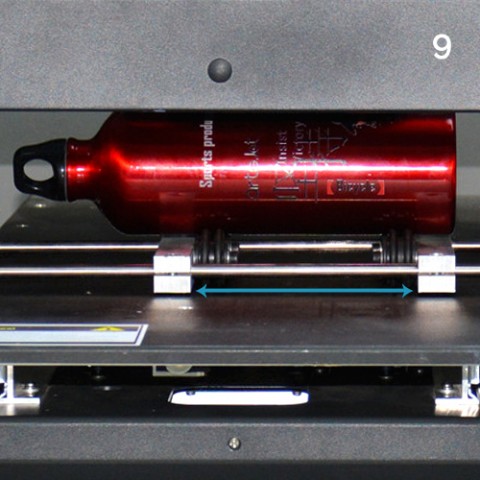
The installation port is applied for the right installation of the rotary attachment. The first step is to adjust the position of the rotary attachment by fixing the four rollers through different screw holes (5). Second step implies moving the printer’s flatbed back and forth after fixing the rotary attachment in order to ensure that all four rollers rotate smoothly. If not, the rotary attachment shall be adjusted to ensure this (6).
How to be sure the rotation will be smooth? Put the media on the rollers and ensure the line at the highest point of the media shall be distanced about 5 mm away from the back center line of the ink pump (11). This is necessary to follow in order to avoid ink spray from the print head when printing on the arc of the bottles (10).
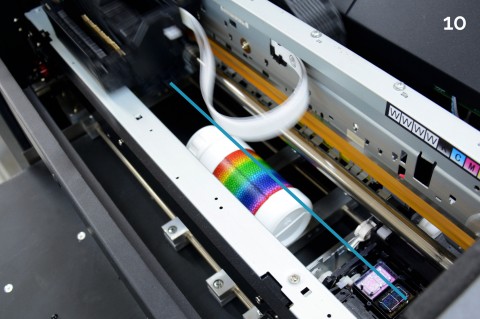
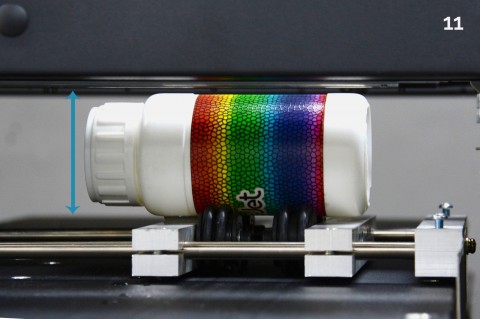
The artisJet rotary attachment is installed. The only thing that needs to be done is to set the software for the design of choice and start the print job of the first bottle with artisJet digital LED UV direct printing solutions.
Watch this video for 360 degree full cylinder printing on small plastic bottle, using the artisJet rotary attachment custom made for artis BR U18700 A3+ LED UV printer.
ARTISJET PHONECASE SOLUTIONS FOR EMBOSSED PRINTING
You may be a designer looking to start a new brand or an online retailer looking to boost your catalog of products, artisJet has the solution. There is no minimum order with artisJet LED UV printers as everything can be printed on demand.
The specialty about printing phone cases and phone covers with artisJet platforms is that the prints can be embossed. You can feel the texture on the phone case. With artisRIP software is easy to know how to emboss the part that you want to be printed with raised colors in the design. Basically, you control what should be embossed and textured.
Custom raised printing can be achieved with multiple layers for inkjet height, delivering varnish and glossy print capability and durable 3D characters printing, with a letter thickness up to 10 mm.
With features as high color brightness, clearness and resolution, the embossed and textured effect gives the possibility to print graphics offering the potential to enhance the results on the substrates by adding vivid colors.
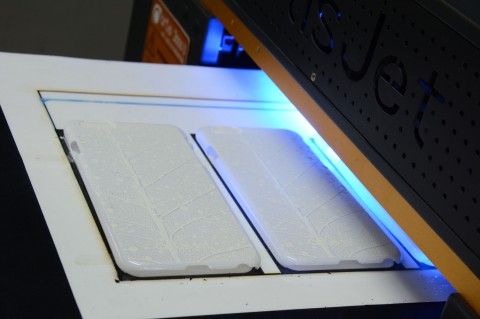
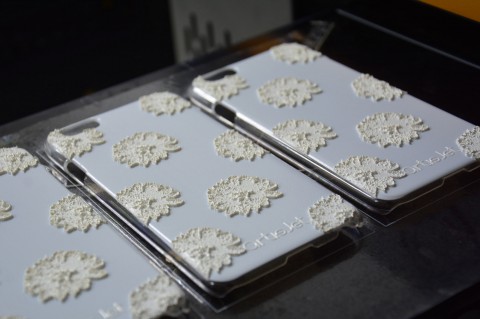
With instant UV curing, artisJet systems ensure printing layered texture or raised printing effect, providing a dimensional print on protective cases and covers for electronics, regardless the type of the material.
UV LED printing offers high quality of the printed image, graphic, artwork, logo or text with durable adhesion of the inks onto metal, various types of plastic, TPU, acrylic and so many rigid an flexible substrates. The UV LED ink is durable and scratch resistant even when printed in multiple layers to achieve the raised effect. The ink adheres perfectly to the substrate.
Create raised texture phone cases on a multitude of brand phone cases: IPhone, Samsung, Huawei, Sony, HTC etc. that will stand out in the market.
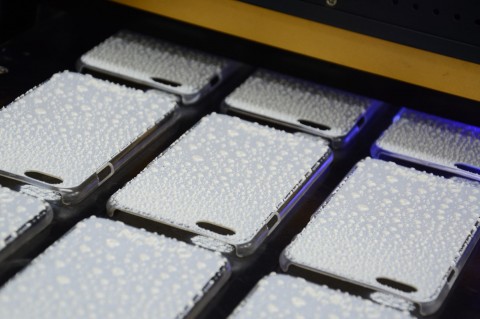
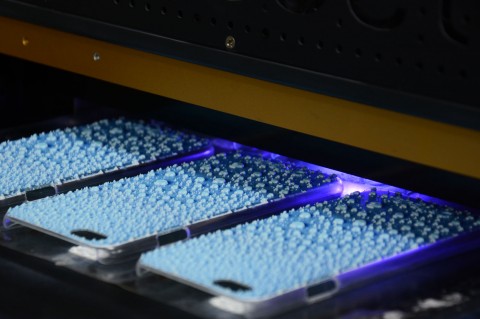
Simple printing process for touchable designs. You can print all types of case with any color in 3D raised effect. Just place the case you need to print onto the working table, edit the artwork you need to print from artisJet case RIP, adjust the software settings and output from artisRIP directly and enjoy the customized phone case final product.
UV LED curing system is ideal to print directly on any case with immediate dry. The ease of printing can also be achieved by multiple printing which is done just by one click on control panel. The white ink capability ensures that all the colors of cases can be printed directly, including white case, black case and transparent case. Due to the anti – static printing system, you can get clear prints even on transparent materials.
LED UV printing options for your phone case business enhancement.
artis 2100U A4 LED UV printer is an ergonomic desktop printer suitable for desktop home based businesses. It is designed to print on multiple small items such as phone covers. It can print 4 Iphone 6 cases at one time pass, due to the special jig for phone cases.
artis 3000U A3+ LED UV desktop printer is great for medium business runners, offering best color performances. It is instantly drying the inks directly on any kind of phone case material such as electroplated phone case printing, TPU phone case printing, acrylic phone case printing, leather phone cover printing, white substrate printing, customized transparent phone cases printing and other phone cases types you can think of for printing.
artisJet A4 and A3+ LED UV systems allow you to print high resolution, photo quality images, logos and detailed text with raised graphics on mobile phone cases and tablet covers.
artisjet gives you all the equipment and materials as well as the training to create a powerful business making beautifully designed, durable custom phone cases with time saving and cost effective printing production.
Interested in artisJet’s printing solution for your business? Discover more by sending your inquiries to This email address is being protected from spambots. You need JavaScript enabled to view it. or easily use the contact form on artisJet website.
You have a favorite printed application sample? Request a sample!
All the printers will encounter problems from time to time when printing day in and day out. In order to achieve durable printing life span and highest quality your printer can produce, consistency is the main key. It is important to keep the print head in top condition and the easiest way of doing this is by simply running a test print or a nozzle check every time before printing. This way you can follow the state of your print head and find out if a cleaning is needed.
Clogged nozzles can cause many printing issues. By doing a nozzle check on a daily basis insures that you are always aware of the current state of your printer’s performance.
What to do if the printer head is clogged? In a previous article, we presented some of the reasons the printer head can clog. The printer head is always the most cost part in a printer and it is a big headache for all the LED UV printer users if they are facing the problem. Before we think about how to clean the clogged head, we have to know if the printer head is really clogged.
But how to judge if the printer head is clogged becomes an essential
question.
If you find that the printed image is unexpectedly faint or dots in the
printed image are missing, you may be able to identify the problem by
checking the print head nozzles. You can check the print head nozzle from
your computer using the Nozzle Check utility in the printer software or from
the printer itself.
Sometimes, even with a perfect nozzle check, the problem cannot be solved
and this can be for several reasons.
Problem: When doing a nozzle check, the color stripes are
supposed to be fully printed, with no interruption in the lines, but
sometimes there are some gaps in the nozzle check (as in the image below)
even after several software Head Cleaning and Automatic Cleaning were done
already.
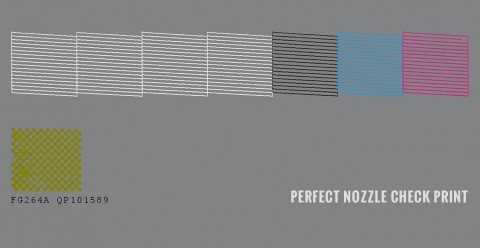
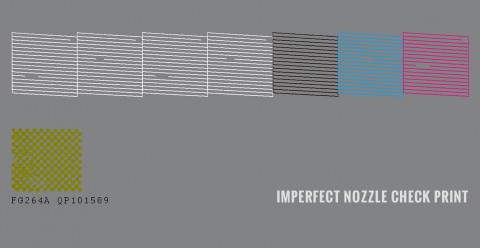
When your nozzle check is the same as the one in the picture, DO NOT go directly to treat it as the printer head is clogged!
Follow the right steps to solve the nozzle check problem.
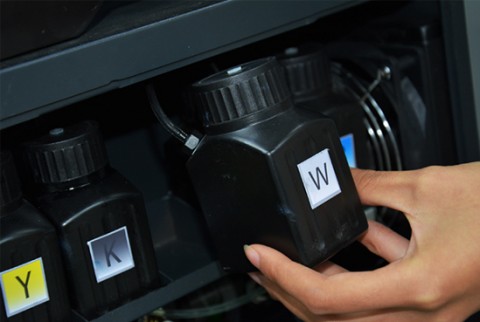
Step 1 – ink level check. Check if there is enough ink in
the ink bottles by opening the ink tanks. Refill ink if the ink tube port is
already above the ink level. After this, proceed by doing the PRINTER HEAD
CLEANING from the software or printer driver.
If the problem persists, try the second step.
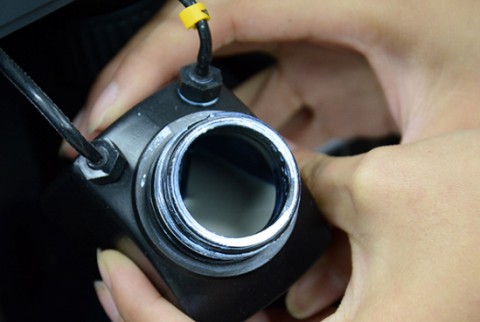
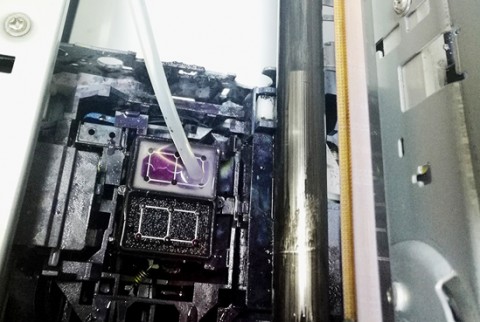
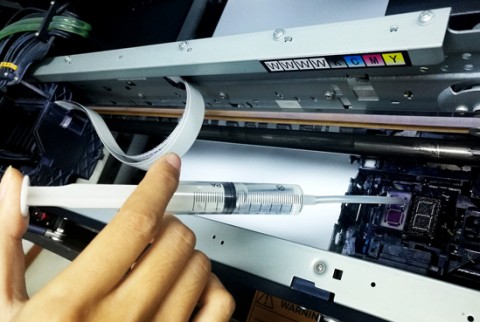
Step 2 – Cap Top situation diagnose. Take the ink
maintenance syringe and suction from the waste ink tank tube. By doing this,
you can encounter several states of the problem.
Firstly, the cap top is in good situation if you can take the inks out easily with some pressure and feel the vacuum well. Then you do not have to practice the following steps but make nozzle check directly again.
Secondly, if you cannot feel the vacuum at all and there is air leaking sound when suction the ink, it means that you are dealing with a cap top malfunction and this requires replacement. The reason? As time goes by, the sponge in the cap top will be melted gradually by the solvents in the ink.
Another reason is that the cap top may be clogged if you cannot drag the syringe and you feel strong vacuum. What to do? Pour the cleaning solution onto the cap top sponge and wait for 10 minutes and suction again until the cap top is in the good situation as mentioned above.
Continue and make nozzle check again. If the nozzle check is good it means the problem is solved. But, if the nozzle check still is not good, then proceed on the following steps.
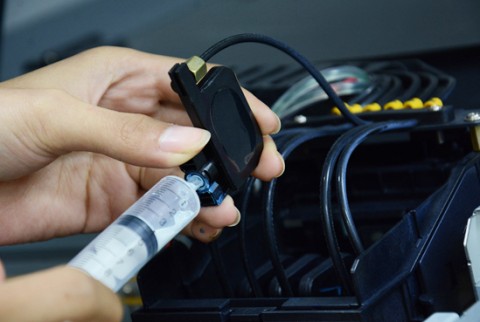
Step 3 – Damper situation diagnose. Take out the damper,
the one for the color which nozzle line is not good from the carriage. If
the damper is normal, then you can suction the ink into the syringe.
The damper will need replacement if you cannot get the ink out or it gets
out too little but with big pressure as the damper is clogged itself.
Finally, if the imperfect nozzle check still exists, then the problem will
be from the printer head!
How to unclog the printer head? One mean is by manual cleaning with cleaning
liquid. If the manual cleaning still cannot solve the problem, clean the
head by ultrasonic device.
The UV LED printer head becomes one of the main problems for all the printer users while enjoying the benefits from the UV LED printing technology.
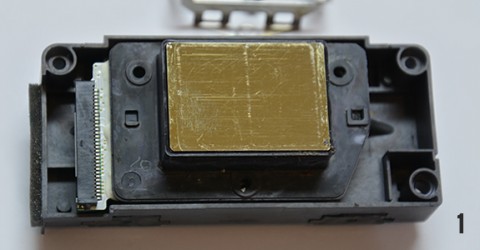
Why the UV LED printer head is more easily to be clogged or blocked? Start from the inside of the printer head itself (take Epson DX5 as an example). The golden surface has 8 chambers and each one contains 180 nozzles with about 1.5 nm diameter (1).
Clogging possibility No.1. The printer head has 8 ink damper holders, one holder for each color (2, 3). The damper is an important part to filter the inks from the ink tubes to the ink heads. The damper holder/filter can cause the clogging in the situation of:
1. Expired ink - when the ink inside the holder is bad quality or there is chemical change;
2. Long time without printing - the ink inside of the head is dry.
Solution:
Do not take the printer head out when the printer will not be used for less than 10 days, but use self-automated maintenance module from the control system.
Do not use the printer where the light is strong, especially direct sun light.
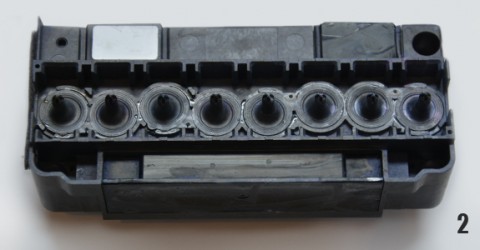
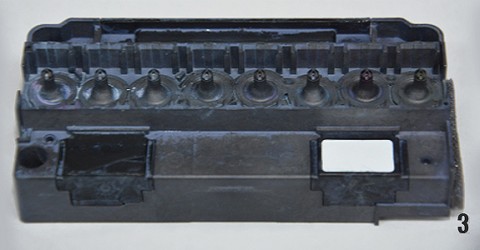
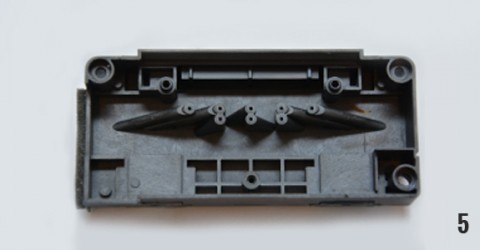
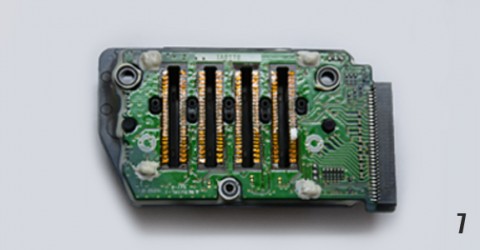
Clogging possibility No.2. Once the electronic part of the printer head is put aside (4), the manifold or adaptor will be exposed (5). Backside of the electronic print part, there is a channel for each color (6). Removing the rubber fixer as seen in the previous image, there are better displayed the eight holes where the ink will follow into the ink chambers are displayed better (7).
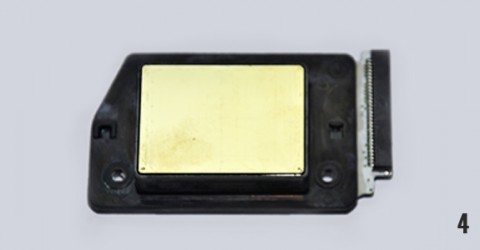
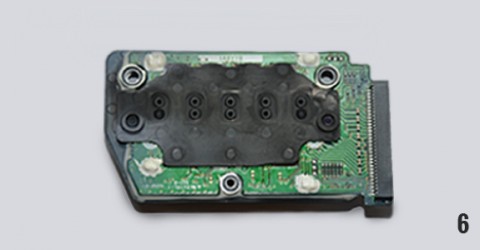
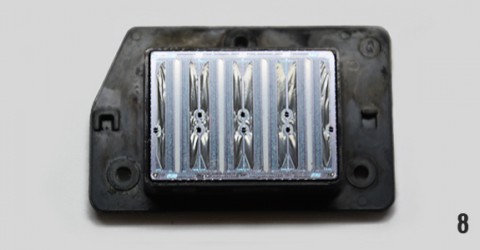
The next step is taking away the gold mirror panel from the back side of the electronic part which will allow seeing that the ink is staying in the plastic rubber container and then it is fired and shot out via the piezo vibration. There are 180 nozzles on each black column (8).
Notice: Even though the nozzles in the column are very small, the ink is hardly clogged here from drying or sedimentation if the ink is of good quality within shelf life.
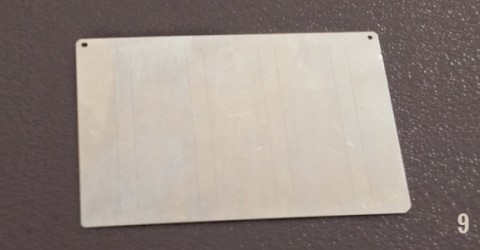
The main reason for clogging is the Mirror Gold Metal Film! This gold mirror film (9) is the last point before the ink is printed out.
Due to the UV LED ink characteristics, the ink hardly dries or decants from inside. It is mainly clogged right at the surface of the mirror gold metal film. Why? One of the reasons is that during printing, the printer will create some powder due to the UV ink features and it will make the mirror side dirty. Another reason is represented by the printer head which is not wet enough and the ink inside will get dry to some degree.
To summarize, the printer head clogging happens for two main reasons:
1. Ink sedimentation which happens when the ink that is used has no quality or is expired and also when the printer is not in printing module, but it lacks on maintenance.
2. Ink drying which happens because of the improper maintenance that doesn’t follow the user manual request and also because of the long exposure of the printer in strong sun light environment.
The head clogging happens mainly because of the Mirror Golden Metal Film from outside to inside gradually. 85% of the printer head clogging is from this part and not any other part.
How to avoid the printer head clogging?
The ink sediments can be avoided by selecting quality inks and store them in the right environments. Also, activate the self-automated maintenance module if you are not going to use the printer. Moreover, change the consumables often (every 2 – 3 months) from ink bottles, ink dampers and wipers and cap top as well.
The ink drying can be avoided by operating the proper daily maintenance and cleaning the powder created from the printing to the Mirror Gold Metal Film. Avoid printer exposure under direct strong sun light environment and UV lighting resources as well.


